What Is the Model Context Protocol (MCP)
The Model Context Protocol (MCP) is an open standard developed by Anthropic to enable easy and standardized integration between AI models and external tools. It acts as a universal connector, allowing large language models (LLMs) to interact dynamically with APIs, databases, and business applications.
Originally built to improve Claude's ability to interact with external systems, Anthropic decided to open-source MCP in early 2024 to encourage industry-wide adoption. By making MCP publicly available, they aimed to create a standardized framework for AI-to-tool communication, reducing reliance on proprietary integrations and enabling greater modularity and interoperability across AI applications.
MCP follows a client-server architecture where:
- MCP clients (e.g., Claude Desktop) request information and execute tasks.
- MCP servers provide access to external tools and data sources.
- Host applications use MCP to communicate between models and tools.
Extending Daraja MCP Beyond payments
While the M-Pesa Daraja API is primarily known for handling mobile payments, its capabilities can be extended to support a wider range of financial and business operations using MCP. Instead of just processing payments, businesses can integrate document processing, invoicing, and financial automation into their workflows.
From Payments to Full Invoice Processing
Imagine receiving an invoice from a supplier. Instead of manually entering details and initiating payment, an AI-powered Daraja MCP server can:
- Extract invoice details using Unstructured.io
- Store the extracted data in a database like MongoDB for tracking and reconciliation.
- Validate the invoice against purchase orders to ensure authenticity.
- Trigger an M-Pesa payment automatically via Daraja API once verified.
- Log the payment confirmation and update financial records.
How It Works
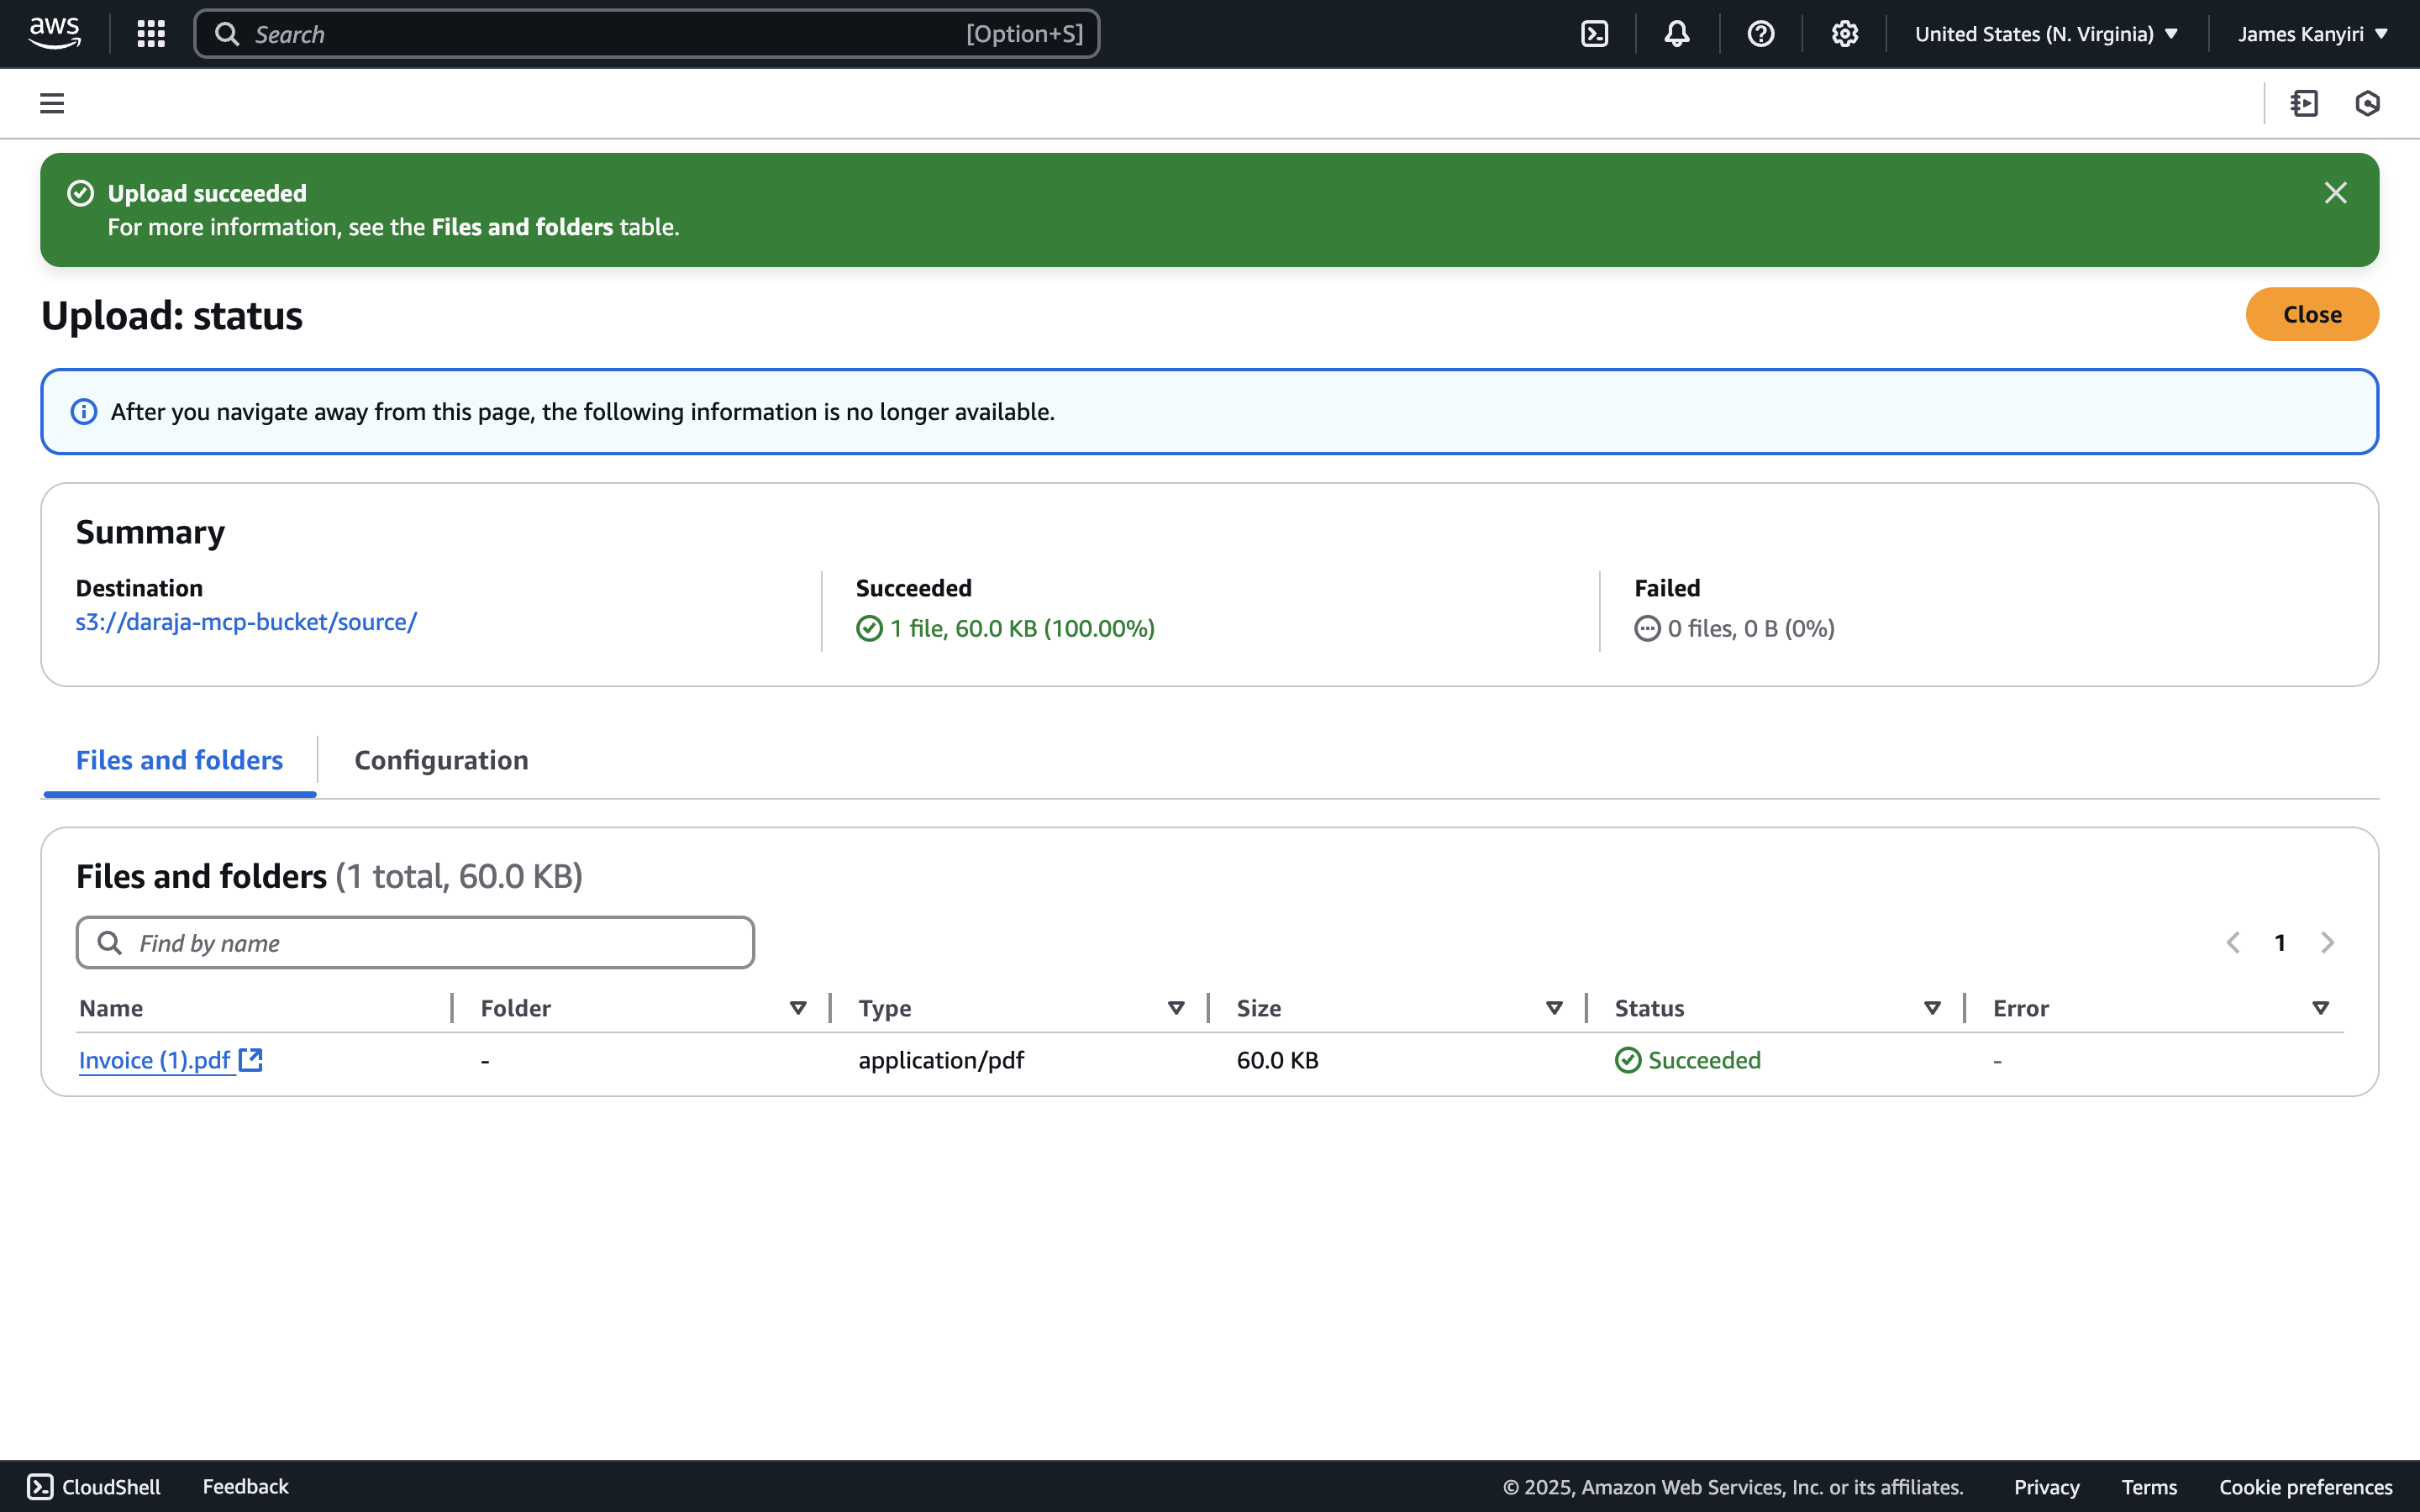
- File Upload: The invoice is uploaded to an S3 bucket.
- Document Processing: An MCP-powered service extracts and structures key details.
- Database Storage: The data is stored in MongoDB for future reference.
- Automated Payment: A payment request is initiated via Daraja based on the extracted details.
This end-to-end automation simplifies business operations, eliminates manual errors, and ensures timely payments.
Getting started with the Daraja MCP Server
In this tutorial, I'll walk you through how to set up and use the Daraja MCP server to:
Upload invoices to AWS S3
Extract invoice details using Unstructured.io
Store extracted data in MongoDB
Automate payments via M-Pesa Daraja API
Before You Begin
Ensure you have Python 3.10+ installed.
Step 1: Setting Up Your Environment
1. Install uv Package Manager
We use uv for managing dependencies efficiently.
For Mac/Linux, run:
curl -LsSf https://astral.sh/uv/install.sh | shFor Windows (PowerShell), run:
powershell -ExecutionPolicy ByPass -c "irm https://astral.sh/uv/install.ps1 | iex"2. Clone the Repository
First, clone the project from GitHub:
git clone https://github.com/jameskanyiri/DarajaMCP.git

cd DarajaMCP
3. Create and Activate a Virtual Environment
uv venv
source .venv/bin/activate  # On Windows: .venv\Scripts\activate
✅ Expected Output: Your terminal prompt should change, indicating the virtual environment is activated.
4. Install Dependencies
uv syncStep 2: Setting Up Environment Variables
Next, we create a .env file that contains all the keys and tokens required for this project.
UNSTRUCTURED_API_KEY="your_unstructured_api_key"

AWS_ACCESS_KEY_ID="your_aws_key"
AWS_SECRET_ACCESS_KEY="your_aws_secret"
AWS_S3_ENDPOINT="your_s3_endpoint"
S3_REMOTE_URL="your_s3_bucket_url"

MONGODB_URI="your_mongodb_uri"
DATABASE_NAME="daraja_mcp_db"
COLLECTION_NAME="invoices"

MPESA_CONSUMER_KEY="your_mpesa_consumer_key"
MPESA_CONSUMER_SECRET="your_mpesa_consumer_secret"
PASSKEY="your_mpesa_passkey"
BUSINESS_SHORTCODE="your_business_shortcode"
CALLBACK_URL="your_callback_url"
BASE_URL="https://sandbox.safaricom.co.ke"
Step 3: Generating Required Keys and Tokens
1. Generating Daraja API Tokens
To generate M-Pesa Daraja API tokens for authentication:
- Visit Safaricom Daraja API and sign up/log in.
- Navigate to MY APPS → Create New App.
- Provide an app name and select the API products you need
- Click Create App.
- Once created, copy the Consumer Key and Consumer Secret—you'll use these for API authentication.
✅ Expected Output: Your app dashboard will display the Consumer Key & Consumer Secret.
2. Setting Up AWS for Invoice Storage
To store invoices in AWS S3 and enable secure access:
Step 1: Create an AWS Account
- Sign up at AWS if you don't already have an account.
- Complete the onboarding process.
Step 2: Create an S3 Bucket
- Go to the S3 Console → AWS S3.
- Click "Create Bucket".
- Configure:
- Bucket name: e.g.,
daraja-invoices. - Block public access: Make sure it is disabled
- Bucket name: e.g.,
- Click Create Bucket.
✅ Expected Output: Your S3 bucket is now ready for invoice storage.
Step 3: Create an IAM User for S3 Access
- Go to the IAM Console → AWS IAM.
- Click Users → Create New User.
- Enter a User Name: e.g.,
daraja-mcp-user. - Client Next
- To set user permissions click Attach existing policies directly.
- Search for
AmazonS3FullAccess→ Click Next - Create user
Step 4: Generate Access Key and Secret
- Go to the IAM Console → AWS IAM.
- Click Users → Click on your user eg
daraja-mcp-user. - Click Security credentials → Create access Key.
- Select Others → Click Next
- Set description then click Create Access Key
- Copy the AWS Access Key ID and Secret Access Key—store them securely.
✅ Expected Output: You now have an IAM user with S3 access credentials.
3. Setting Up MongoDB Atlas for Invoice Storage
To store extracted invoice data, use MongoDB Atlas:
Step 1: Create a MongoDB Atlas Account
- Sign up at MongoDB Atlas.
Step 2: Create a Database Cluster
- Click "Create a New Cluster" (Choose Free Tier for testing).
- Select a Cloud Provider and Region.
- Click Create Cluster and wait for the setup to complete.
Step 3: Create a Database User
- Navigate to Database Access → Create New Database User.
- Set a username and password for secure access.
- Database user privileges. add buil-in roles select Atlas Admin
Step 4: Get Your MongoDB Connection String
-
Go to Database Clusters → Connect → Drivers.
-
Copy the MongoDB Connection String (it should look like this):
mongodb+srv://<username>:<password>@cluster0.mongodb.net/<database>?retryWrites=true&w=majority -
Replace
<username>and<password>with your credentials.
✅ Expected Output: Your MongoDB cluster is live, and you have a connection string.
4. Updating the .env File with Credentials
After generating all the required credentials, update your .env file:
Now your system is fully configured to:
- Authenticate Daraja API requests
- Store invoices in AWS S3
- Process and save extracted data in MongoDB
Updated Invoice Processing & Payment Workflow
- Upload Invoice to AWS S3
- The invoice file is uploaded to an AWS S3 bucket for storage and later processing.
-
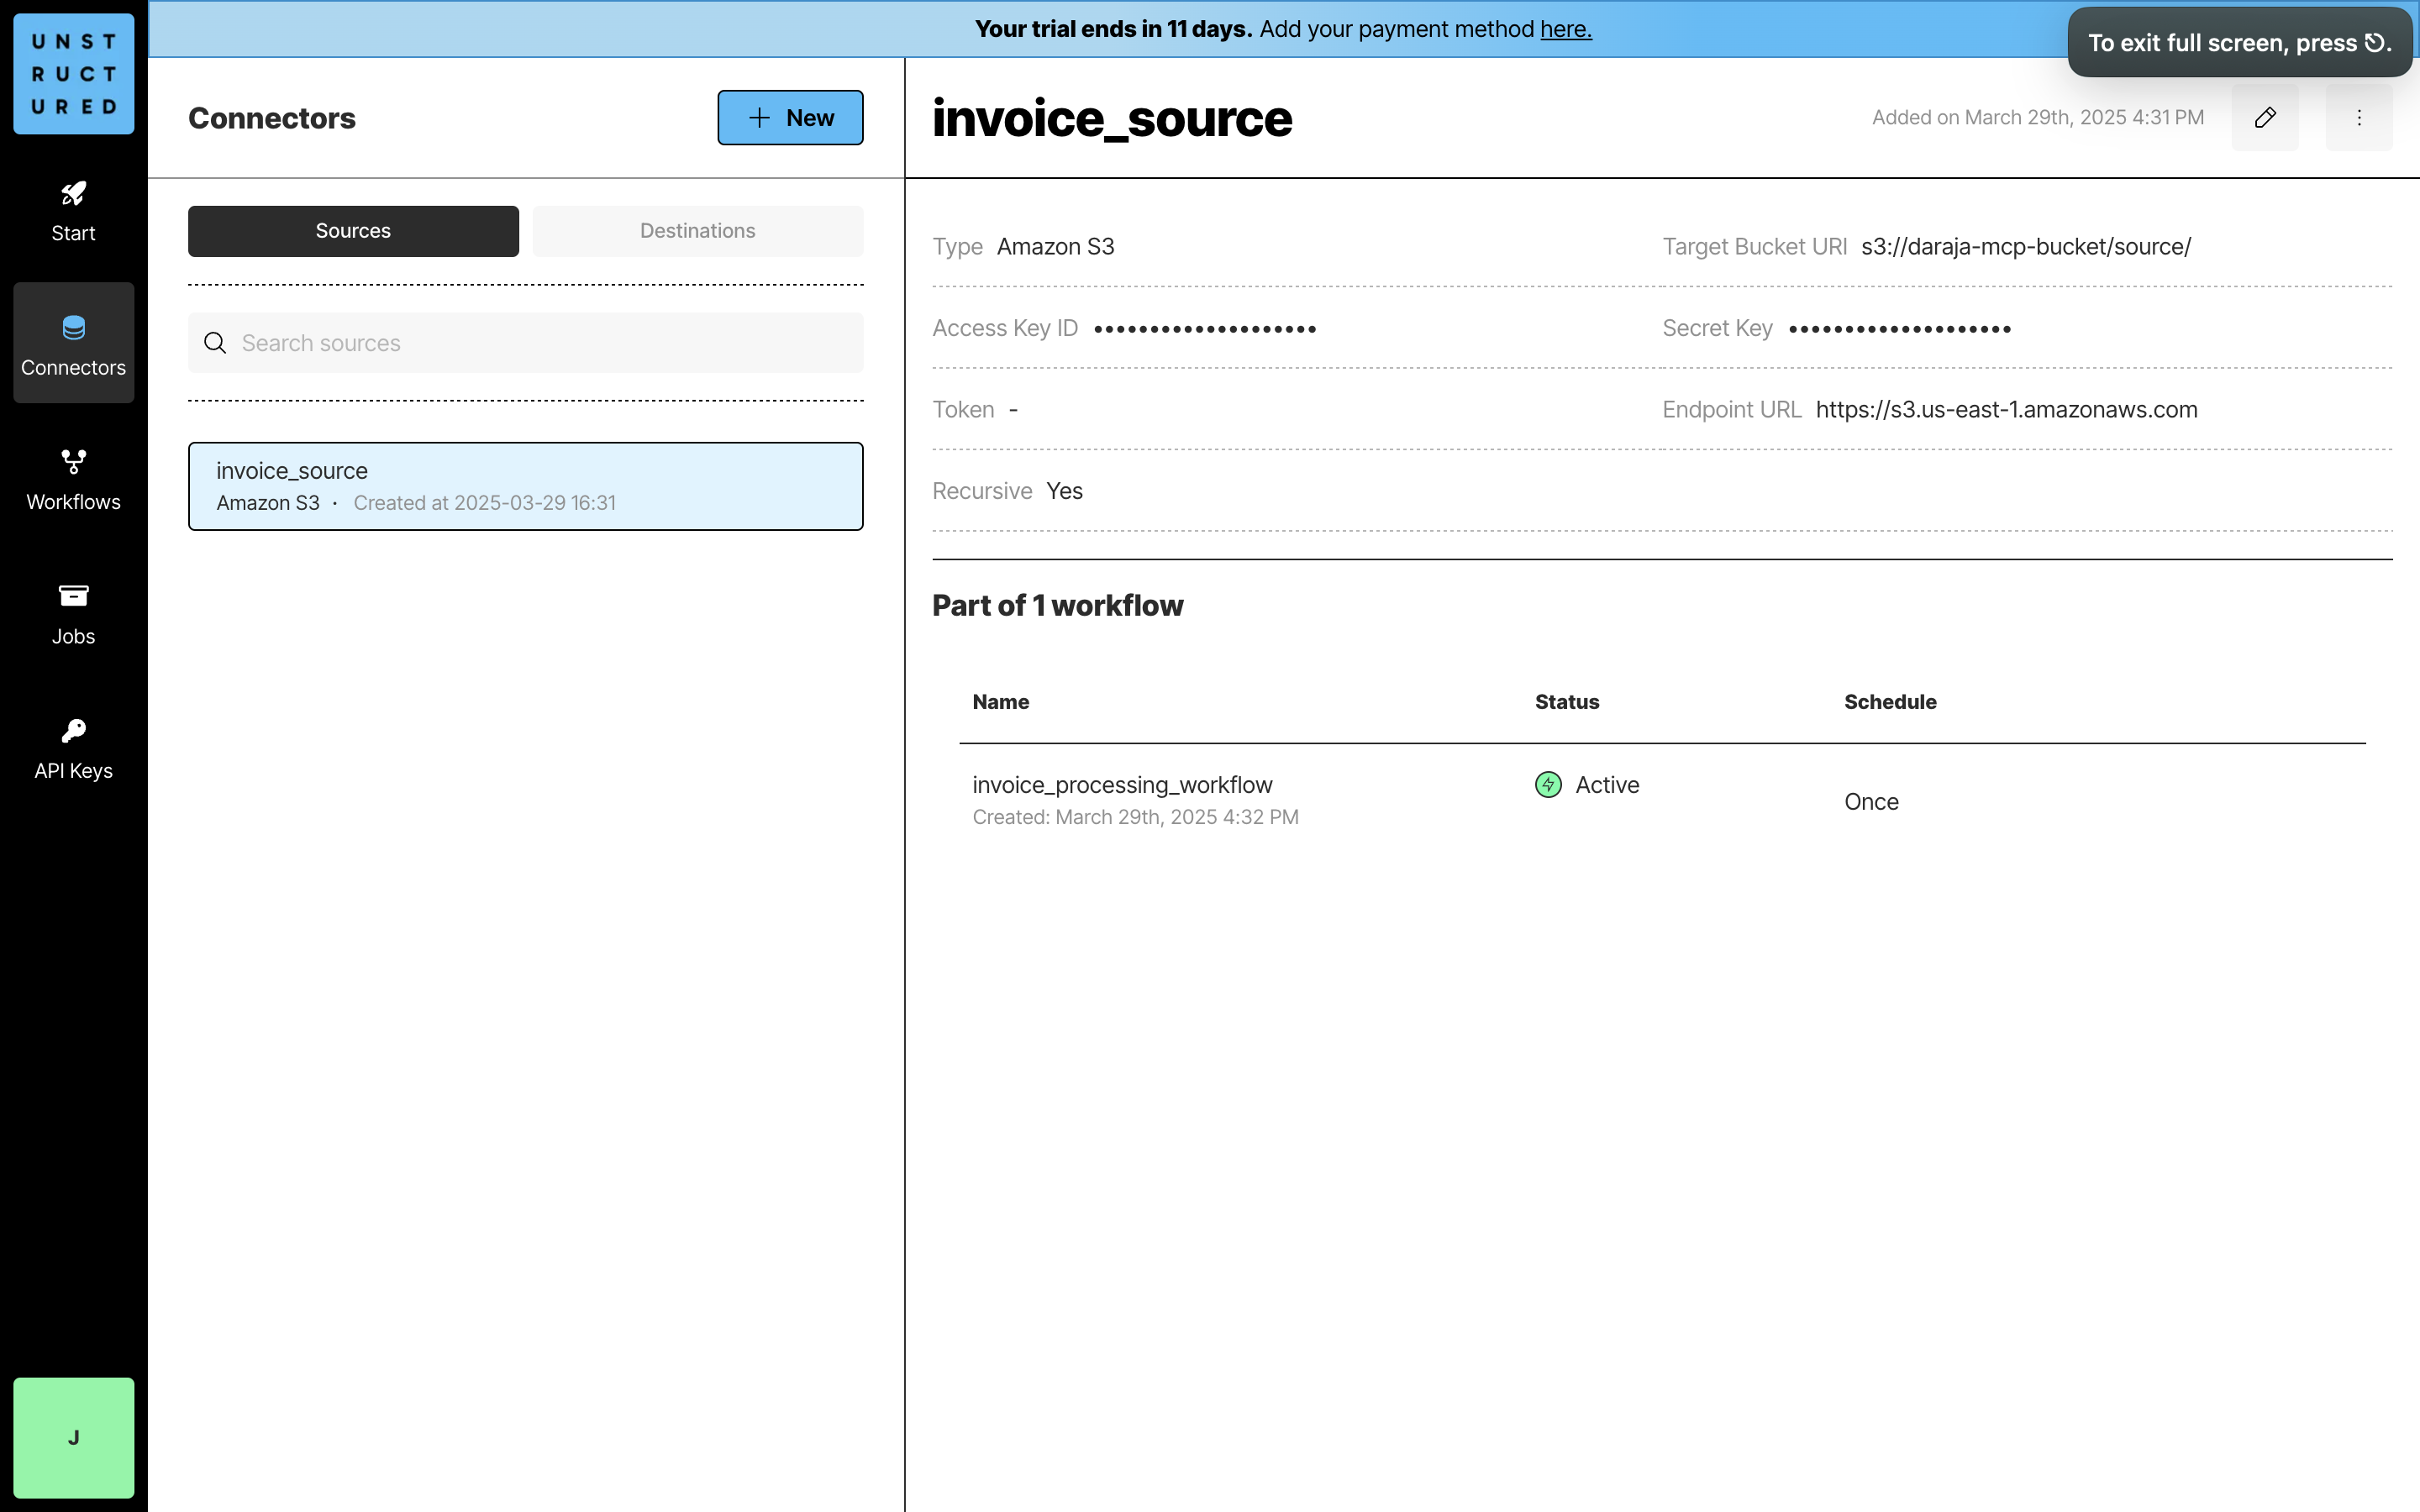
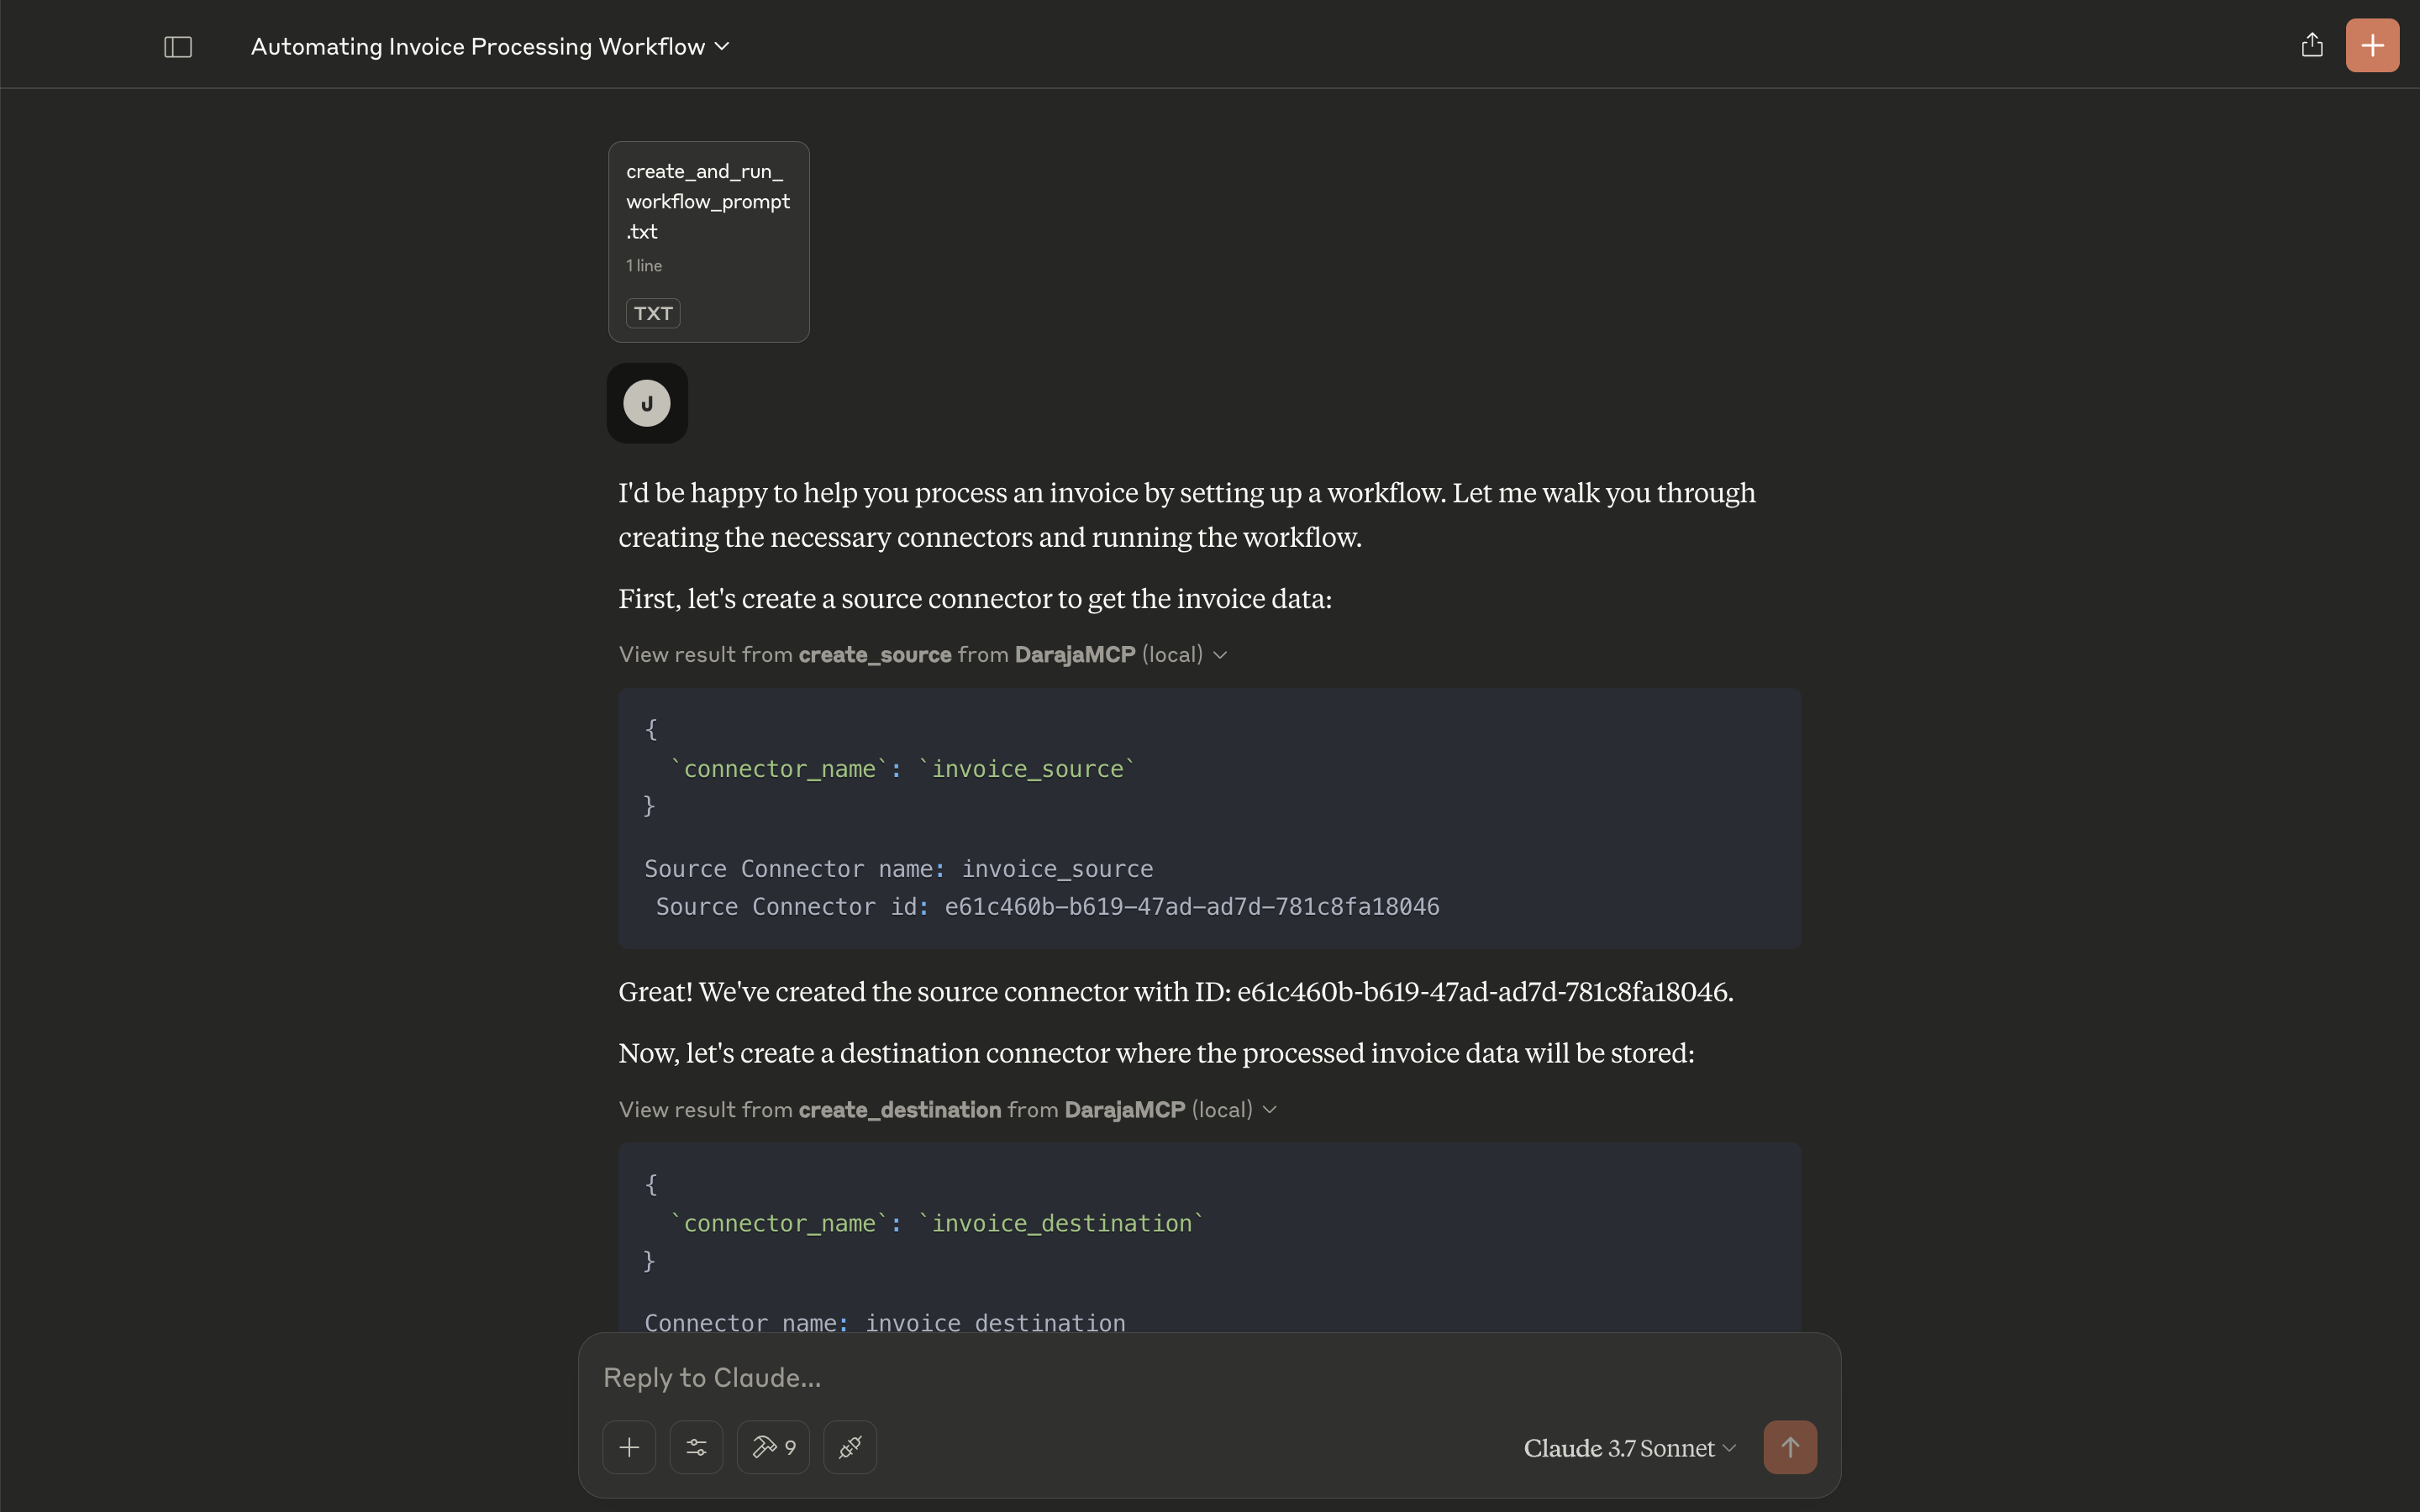
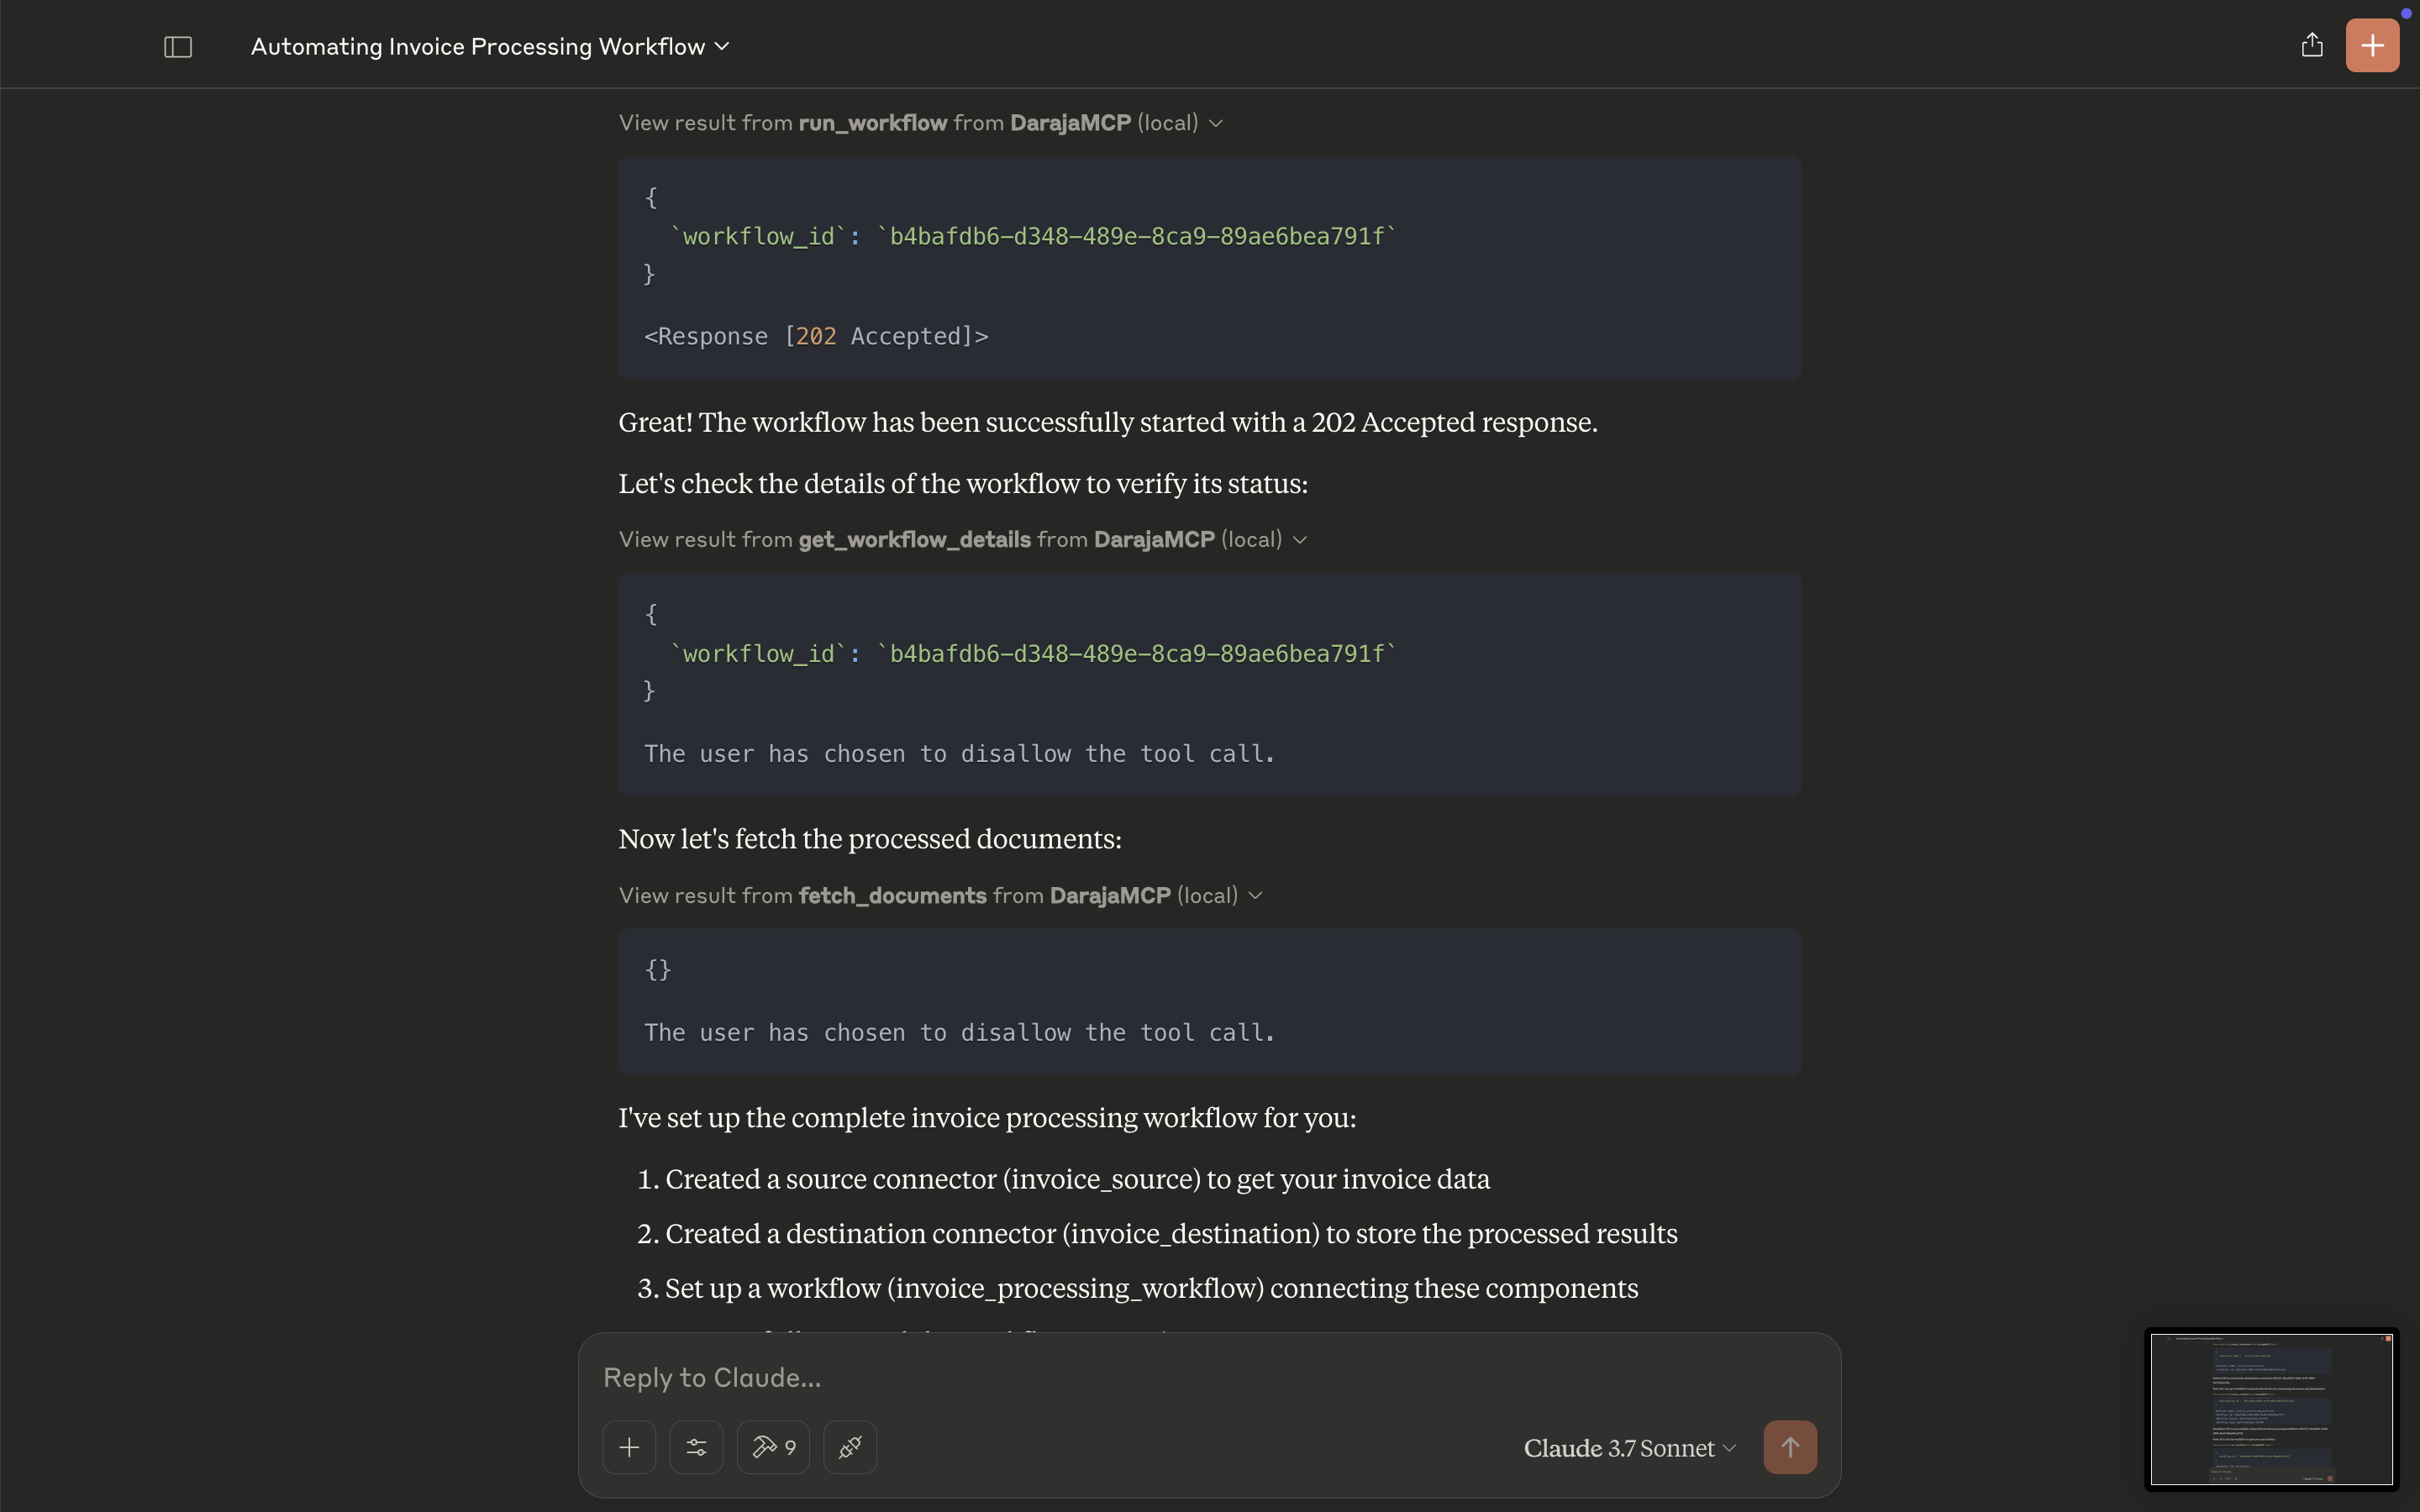
Create a Source Connector
- A source connector is initialized to retrieve the invoice data from AWS S3.
-
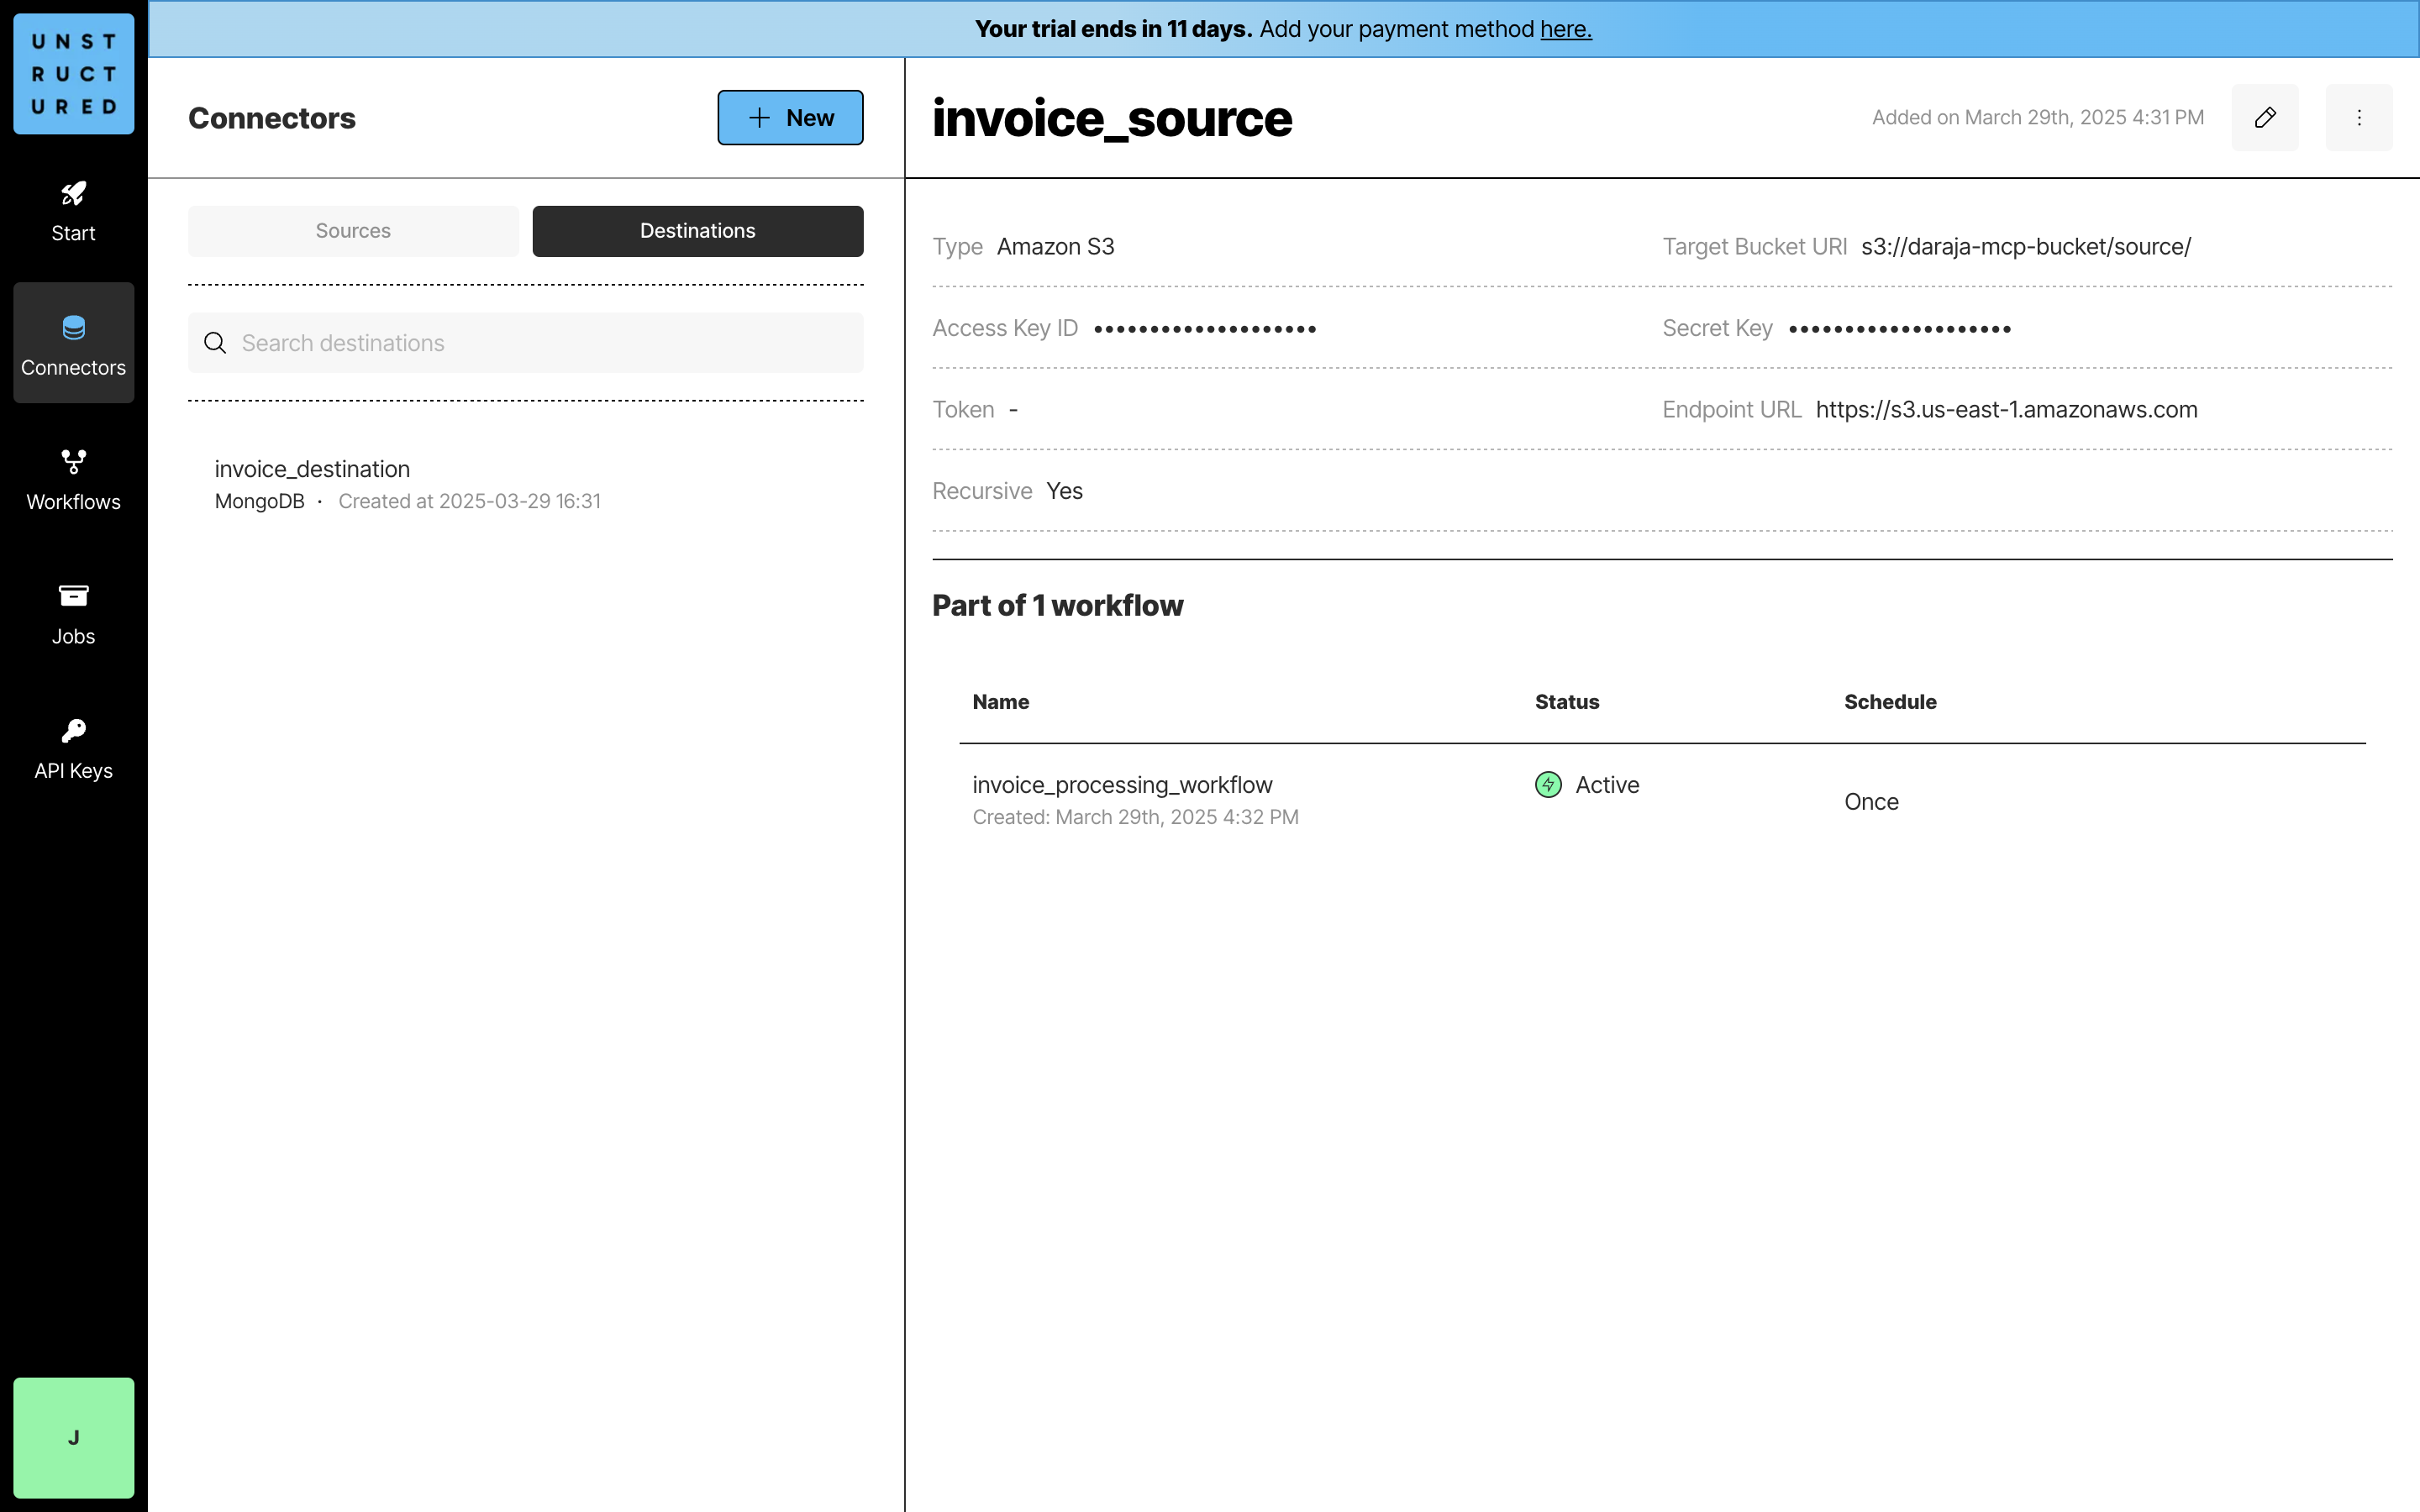
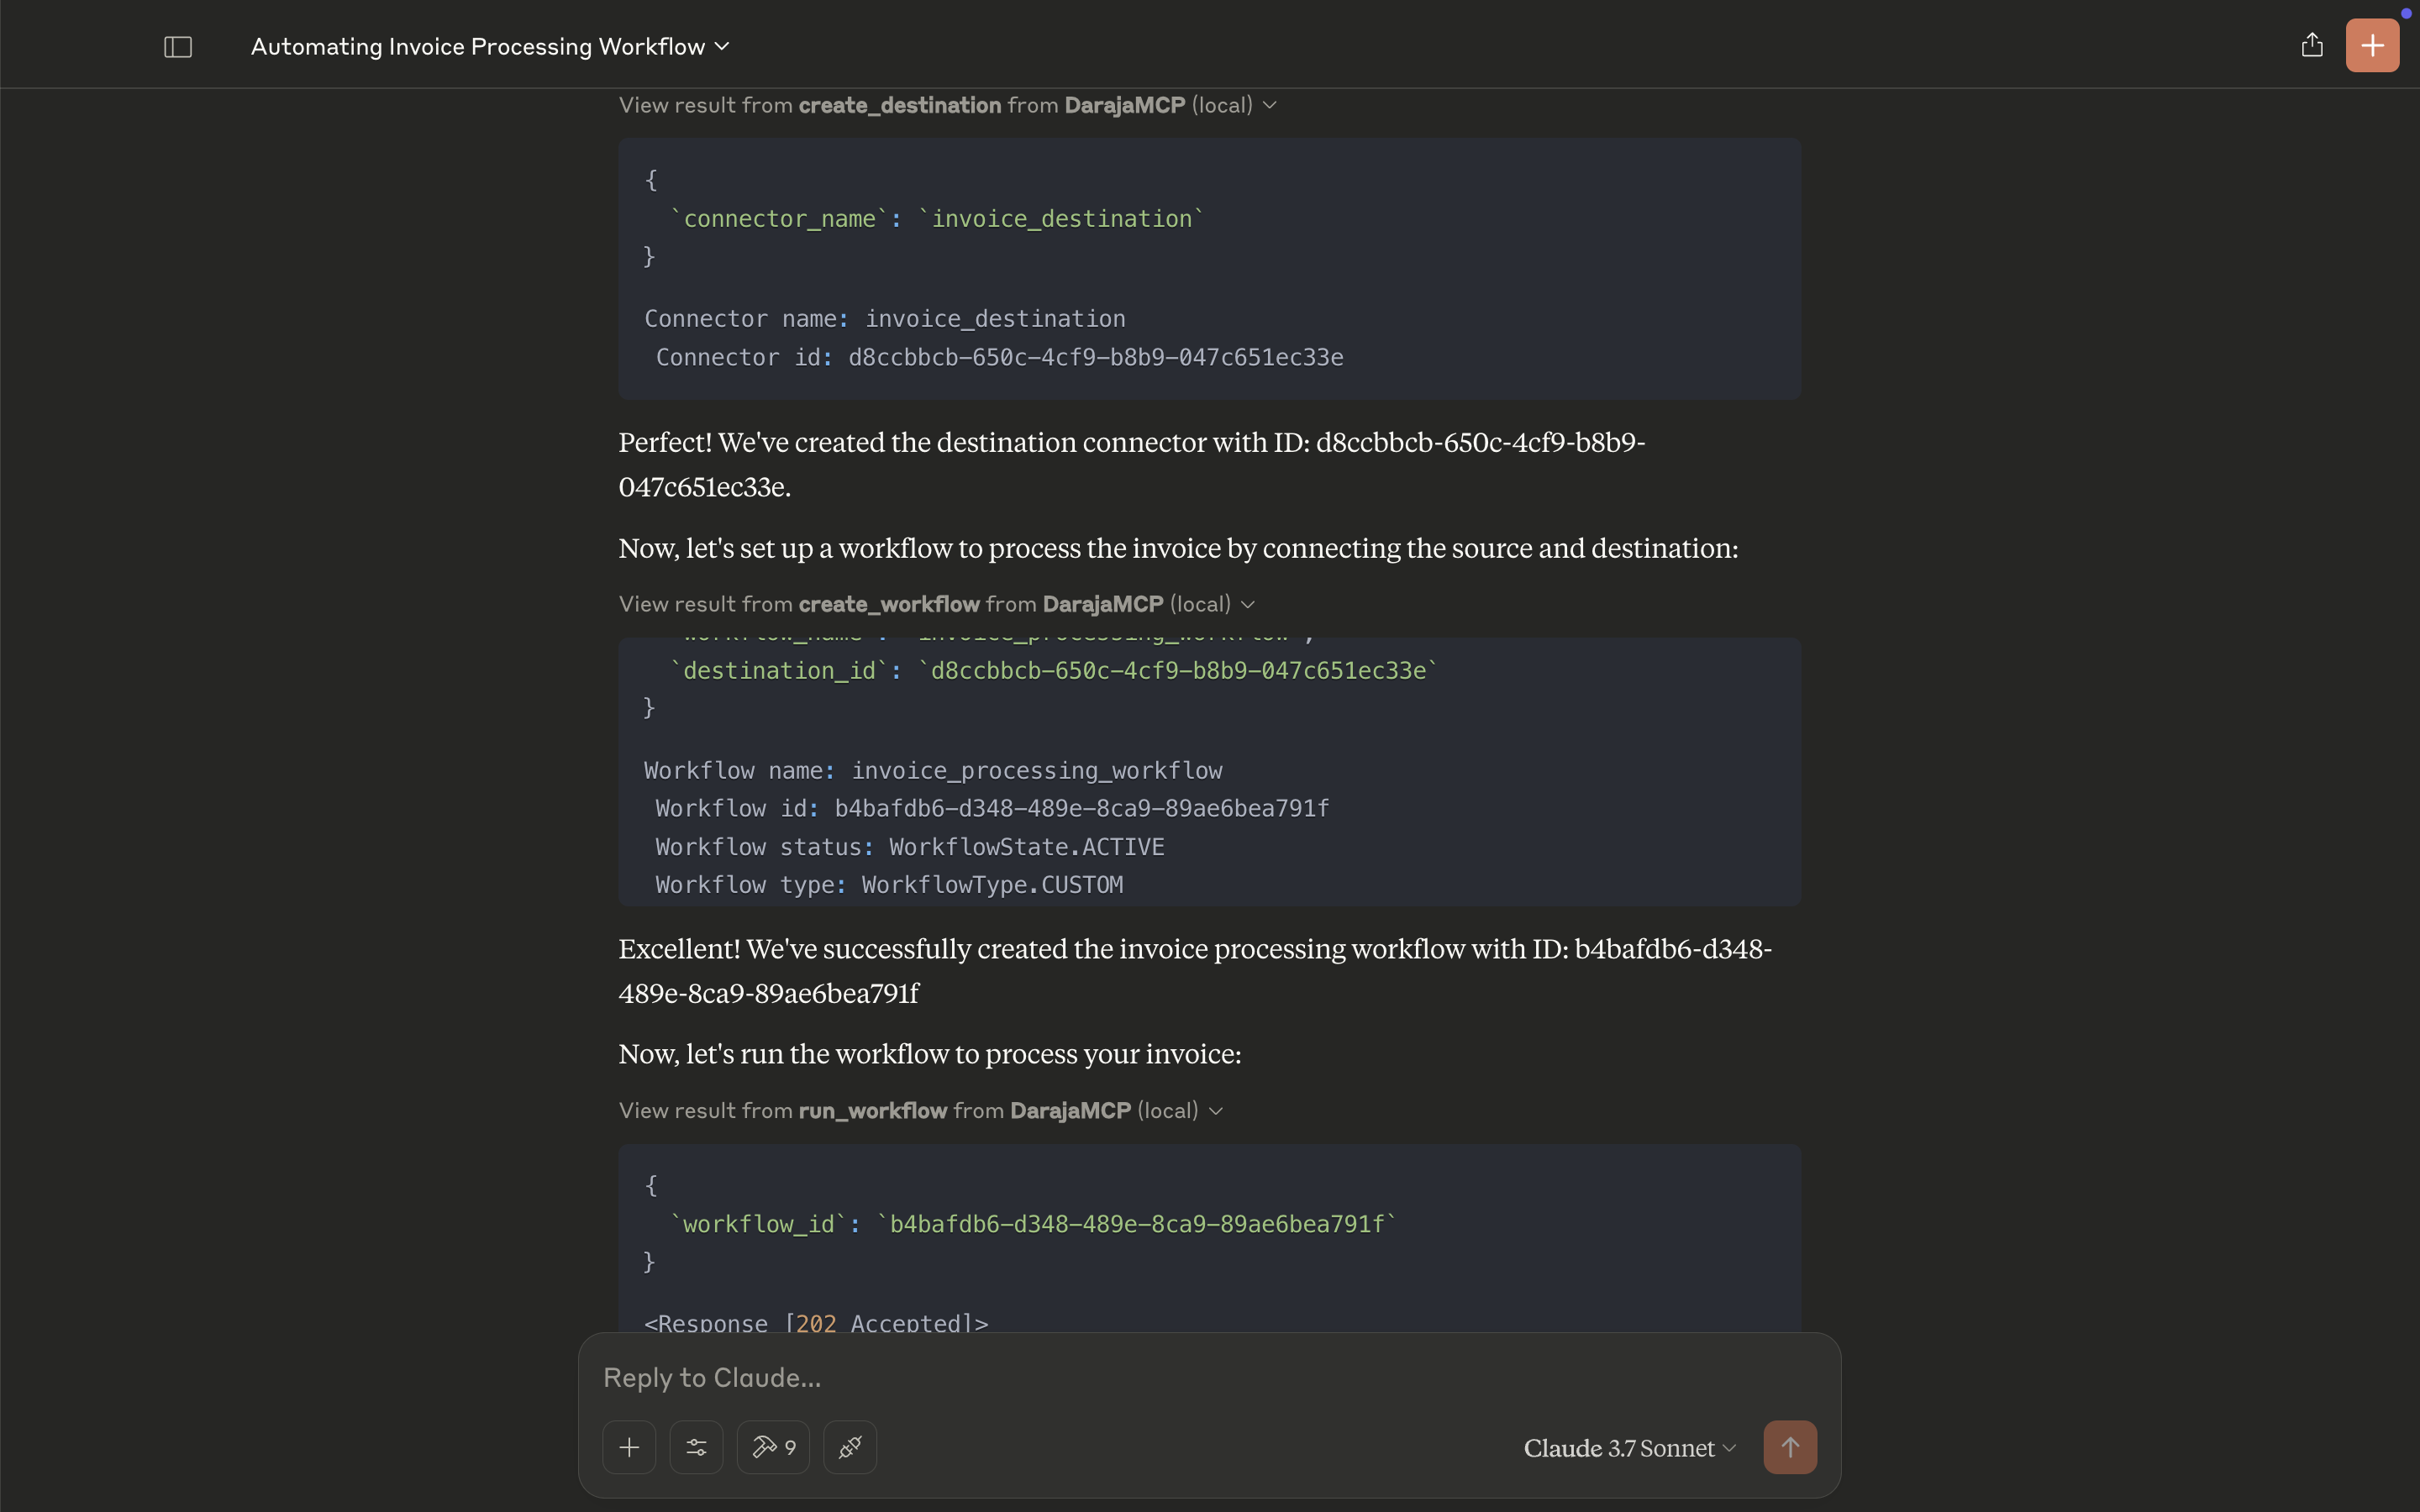
Create a Destination Connector
- A destination connector is set up to store processed invoice data.
-
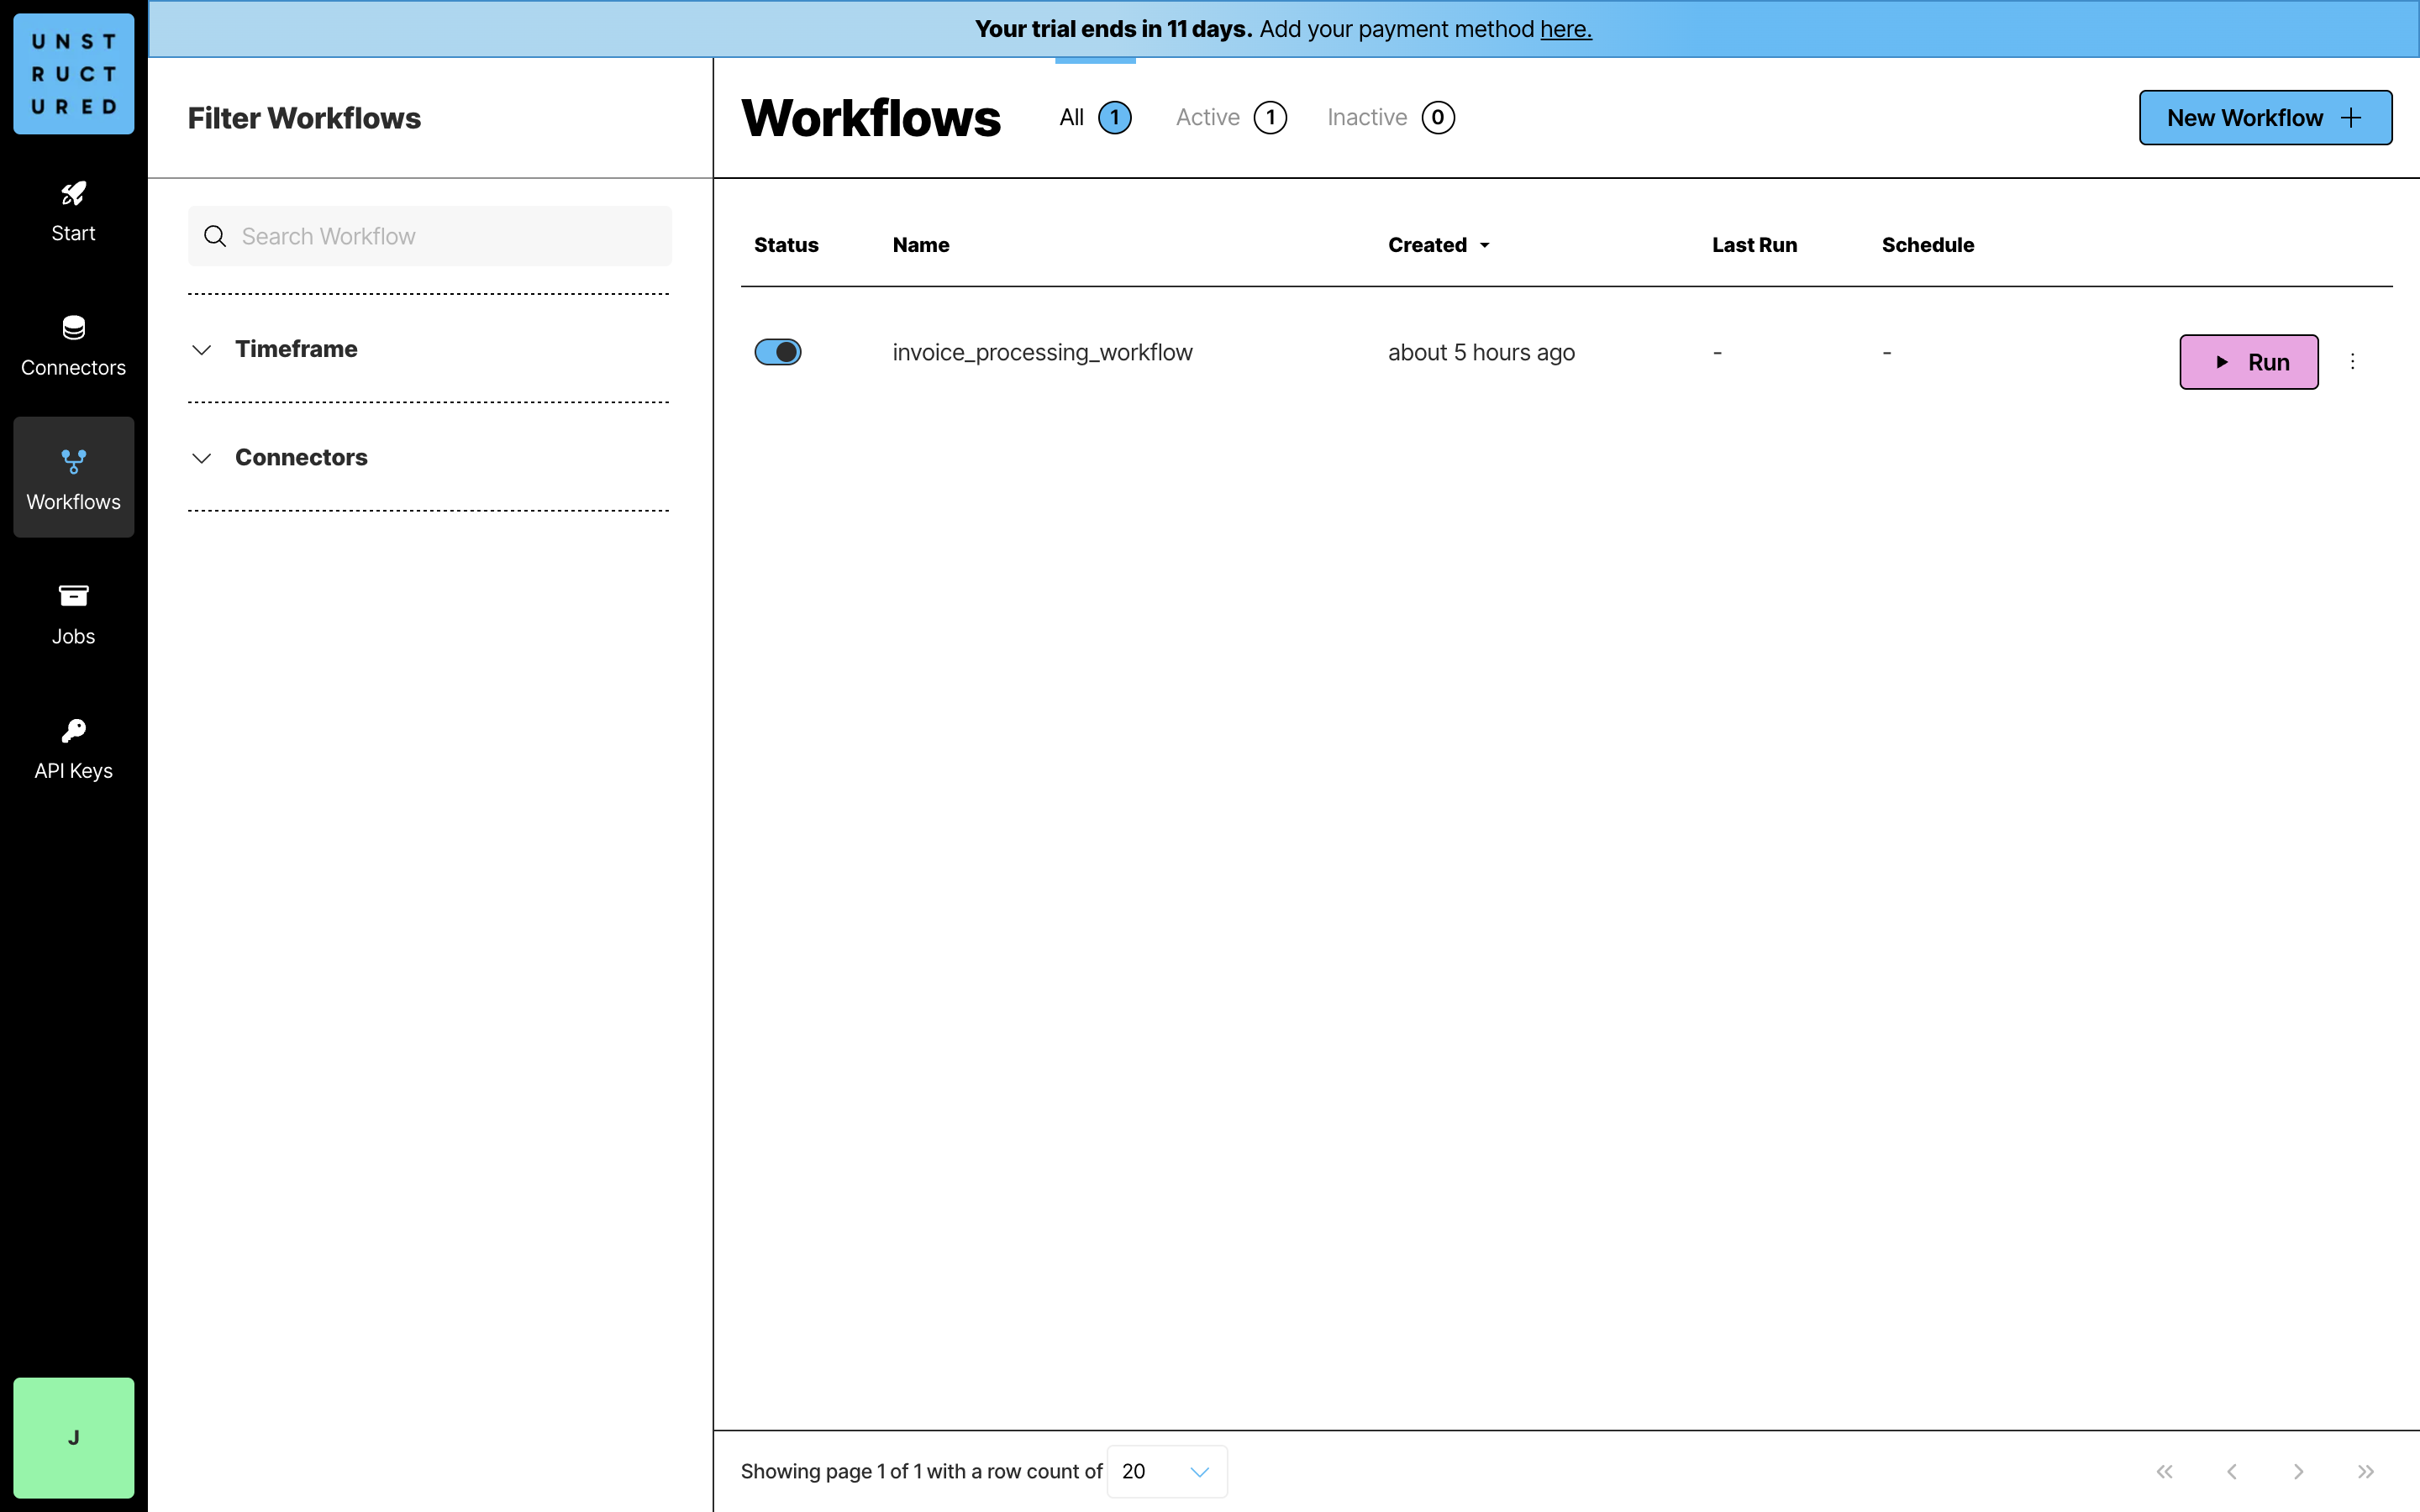
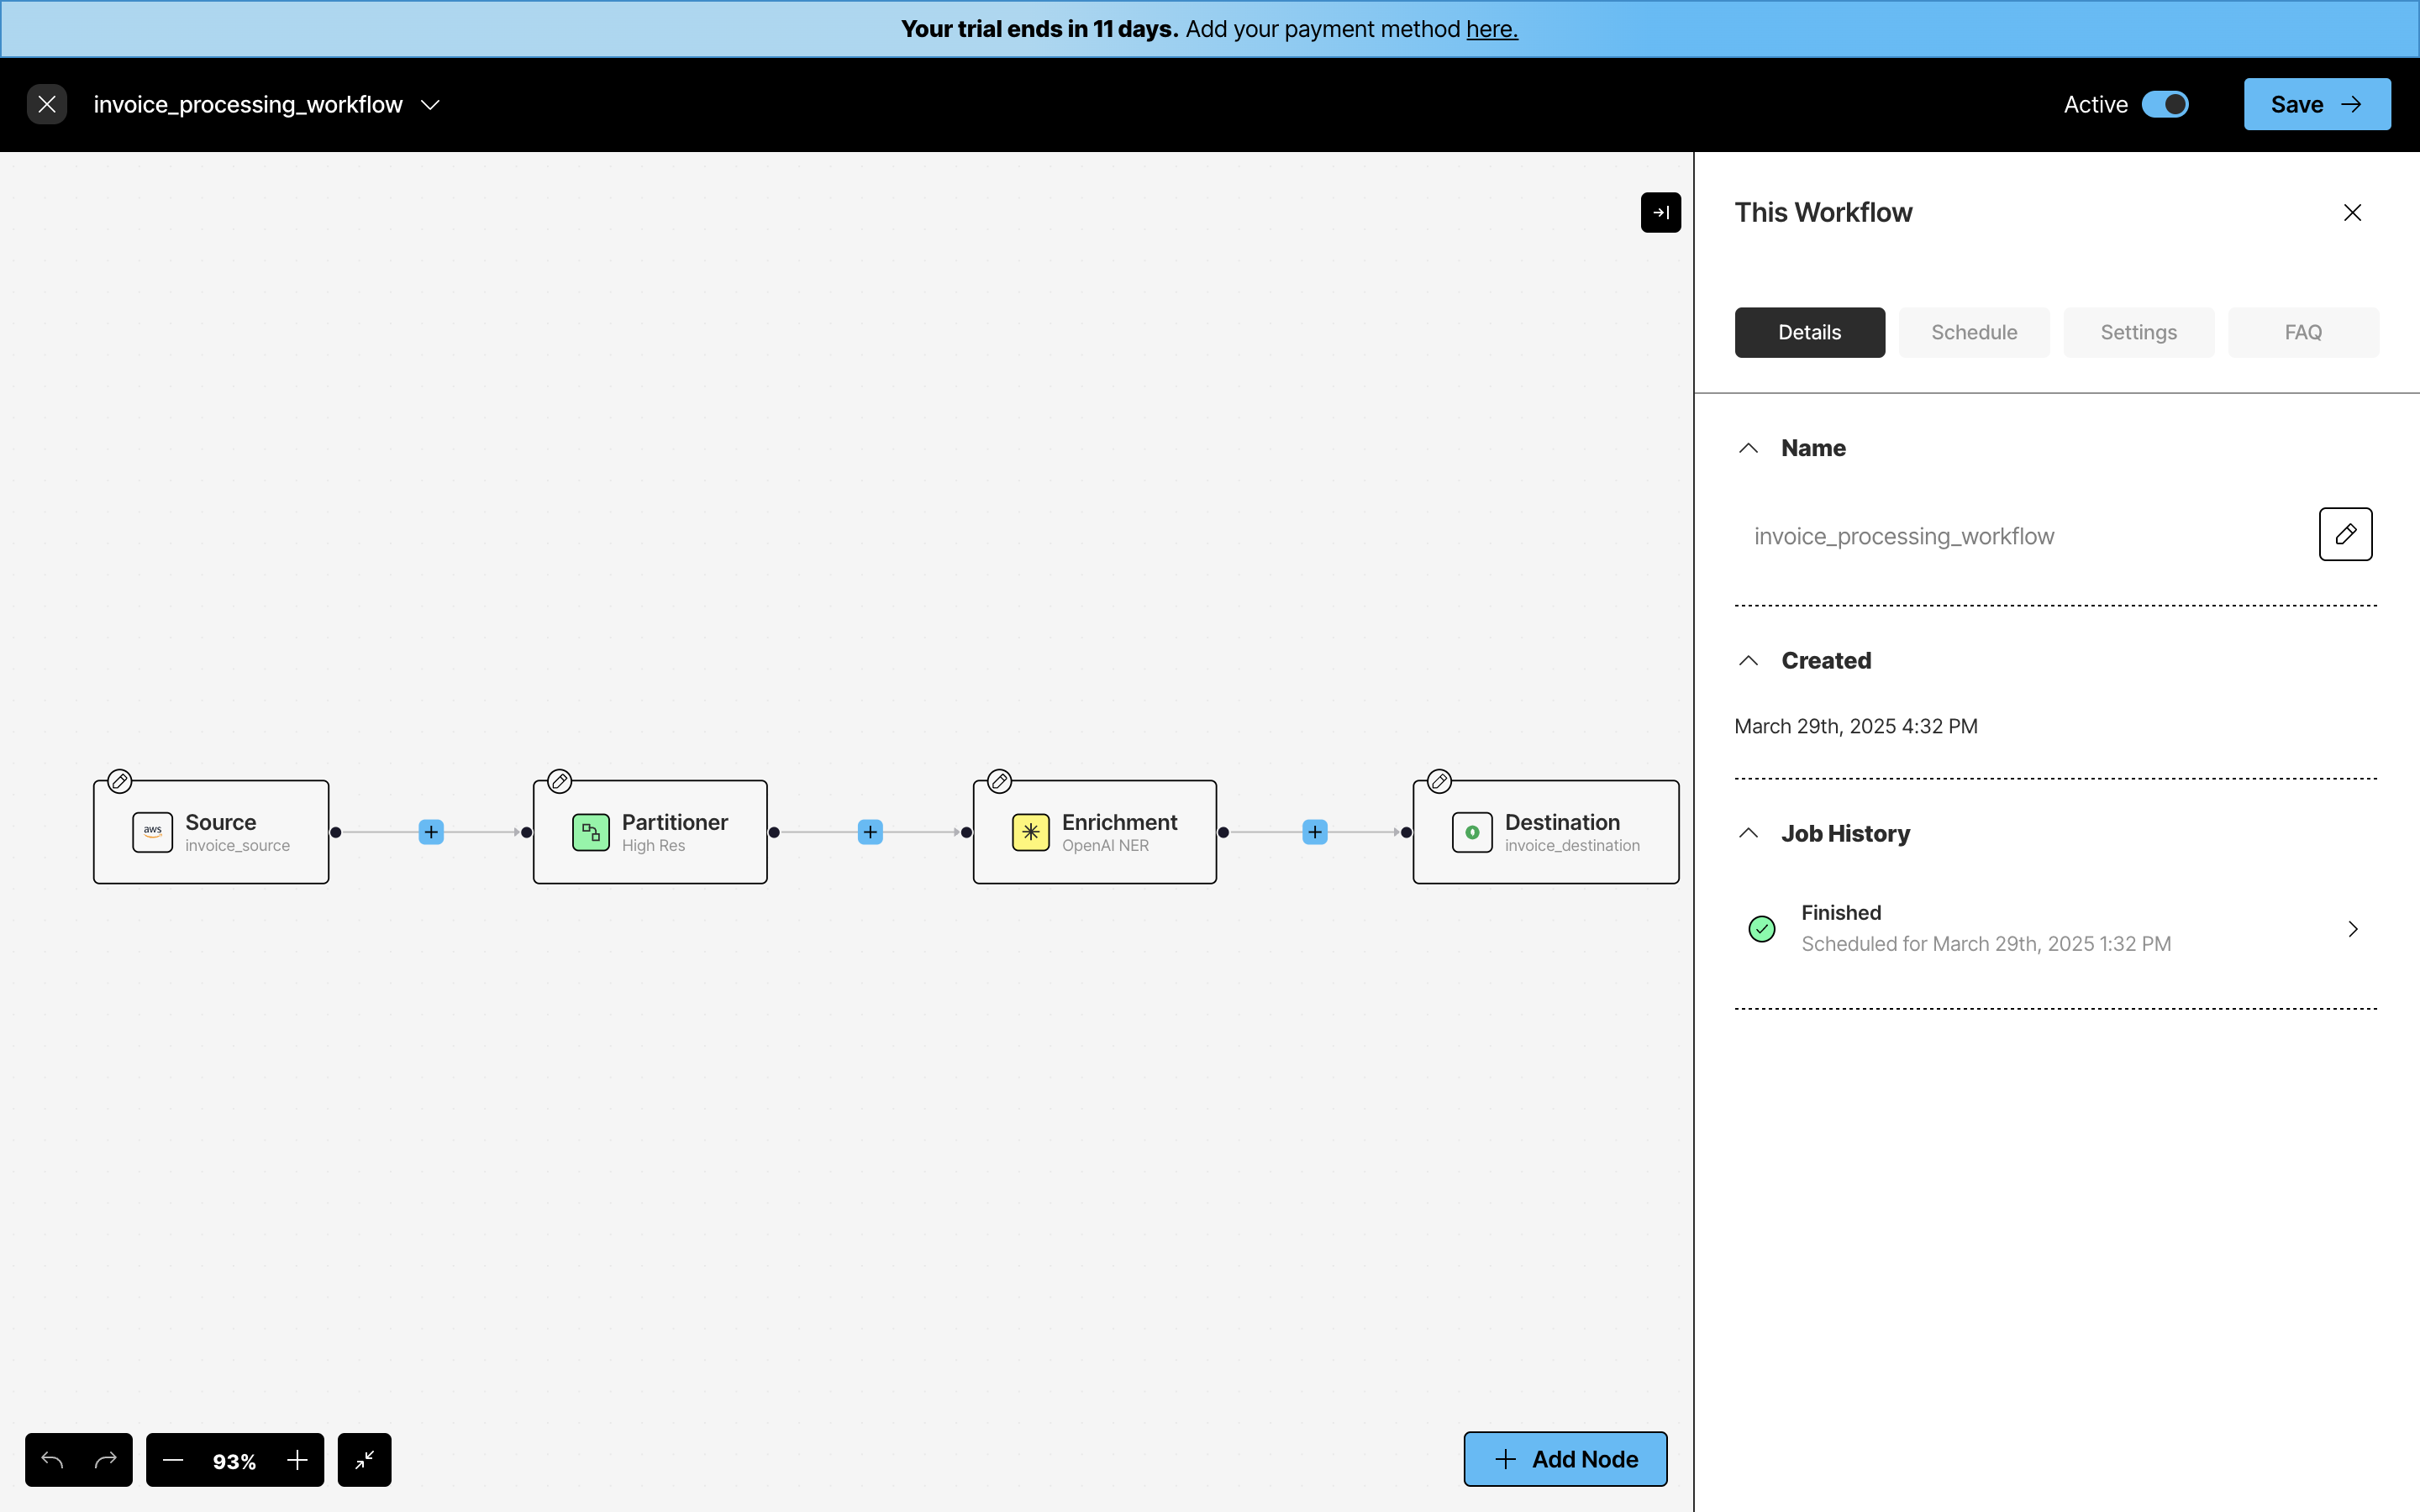
Set Up the Workflow
- The workflow
invoice_processing_workflowis created, linking the source (AWS) and destination connectors.
- The workflow
-
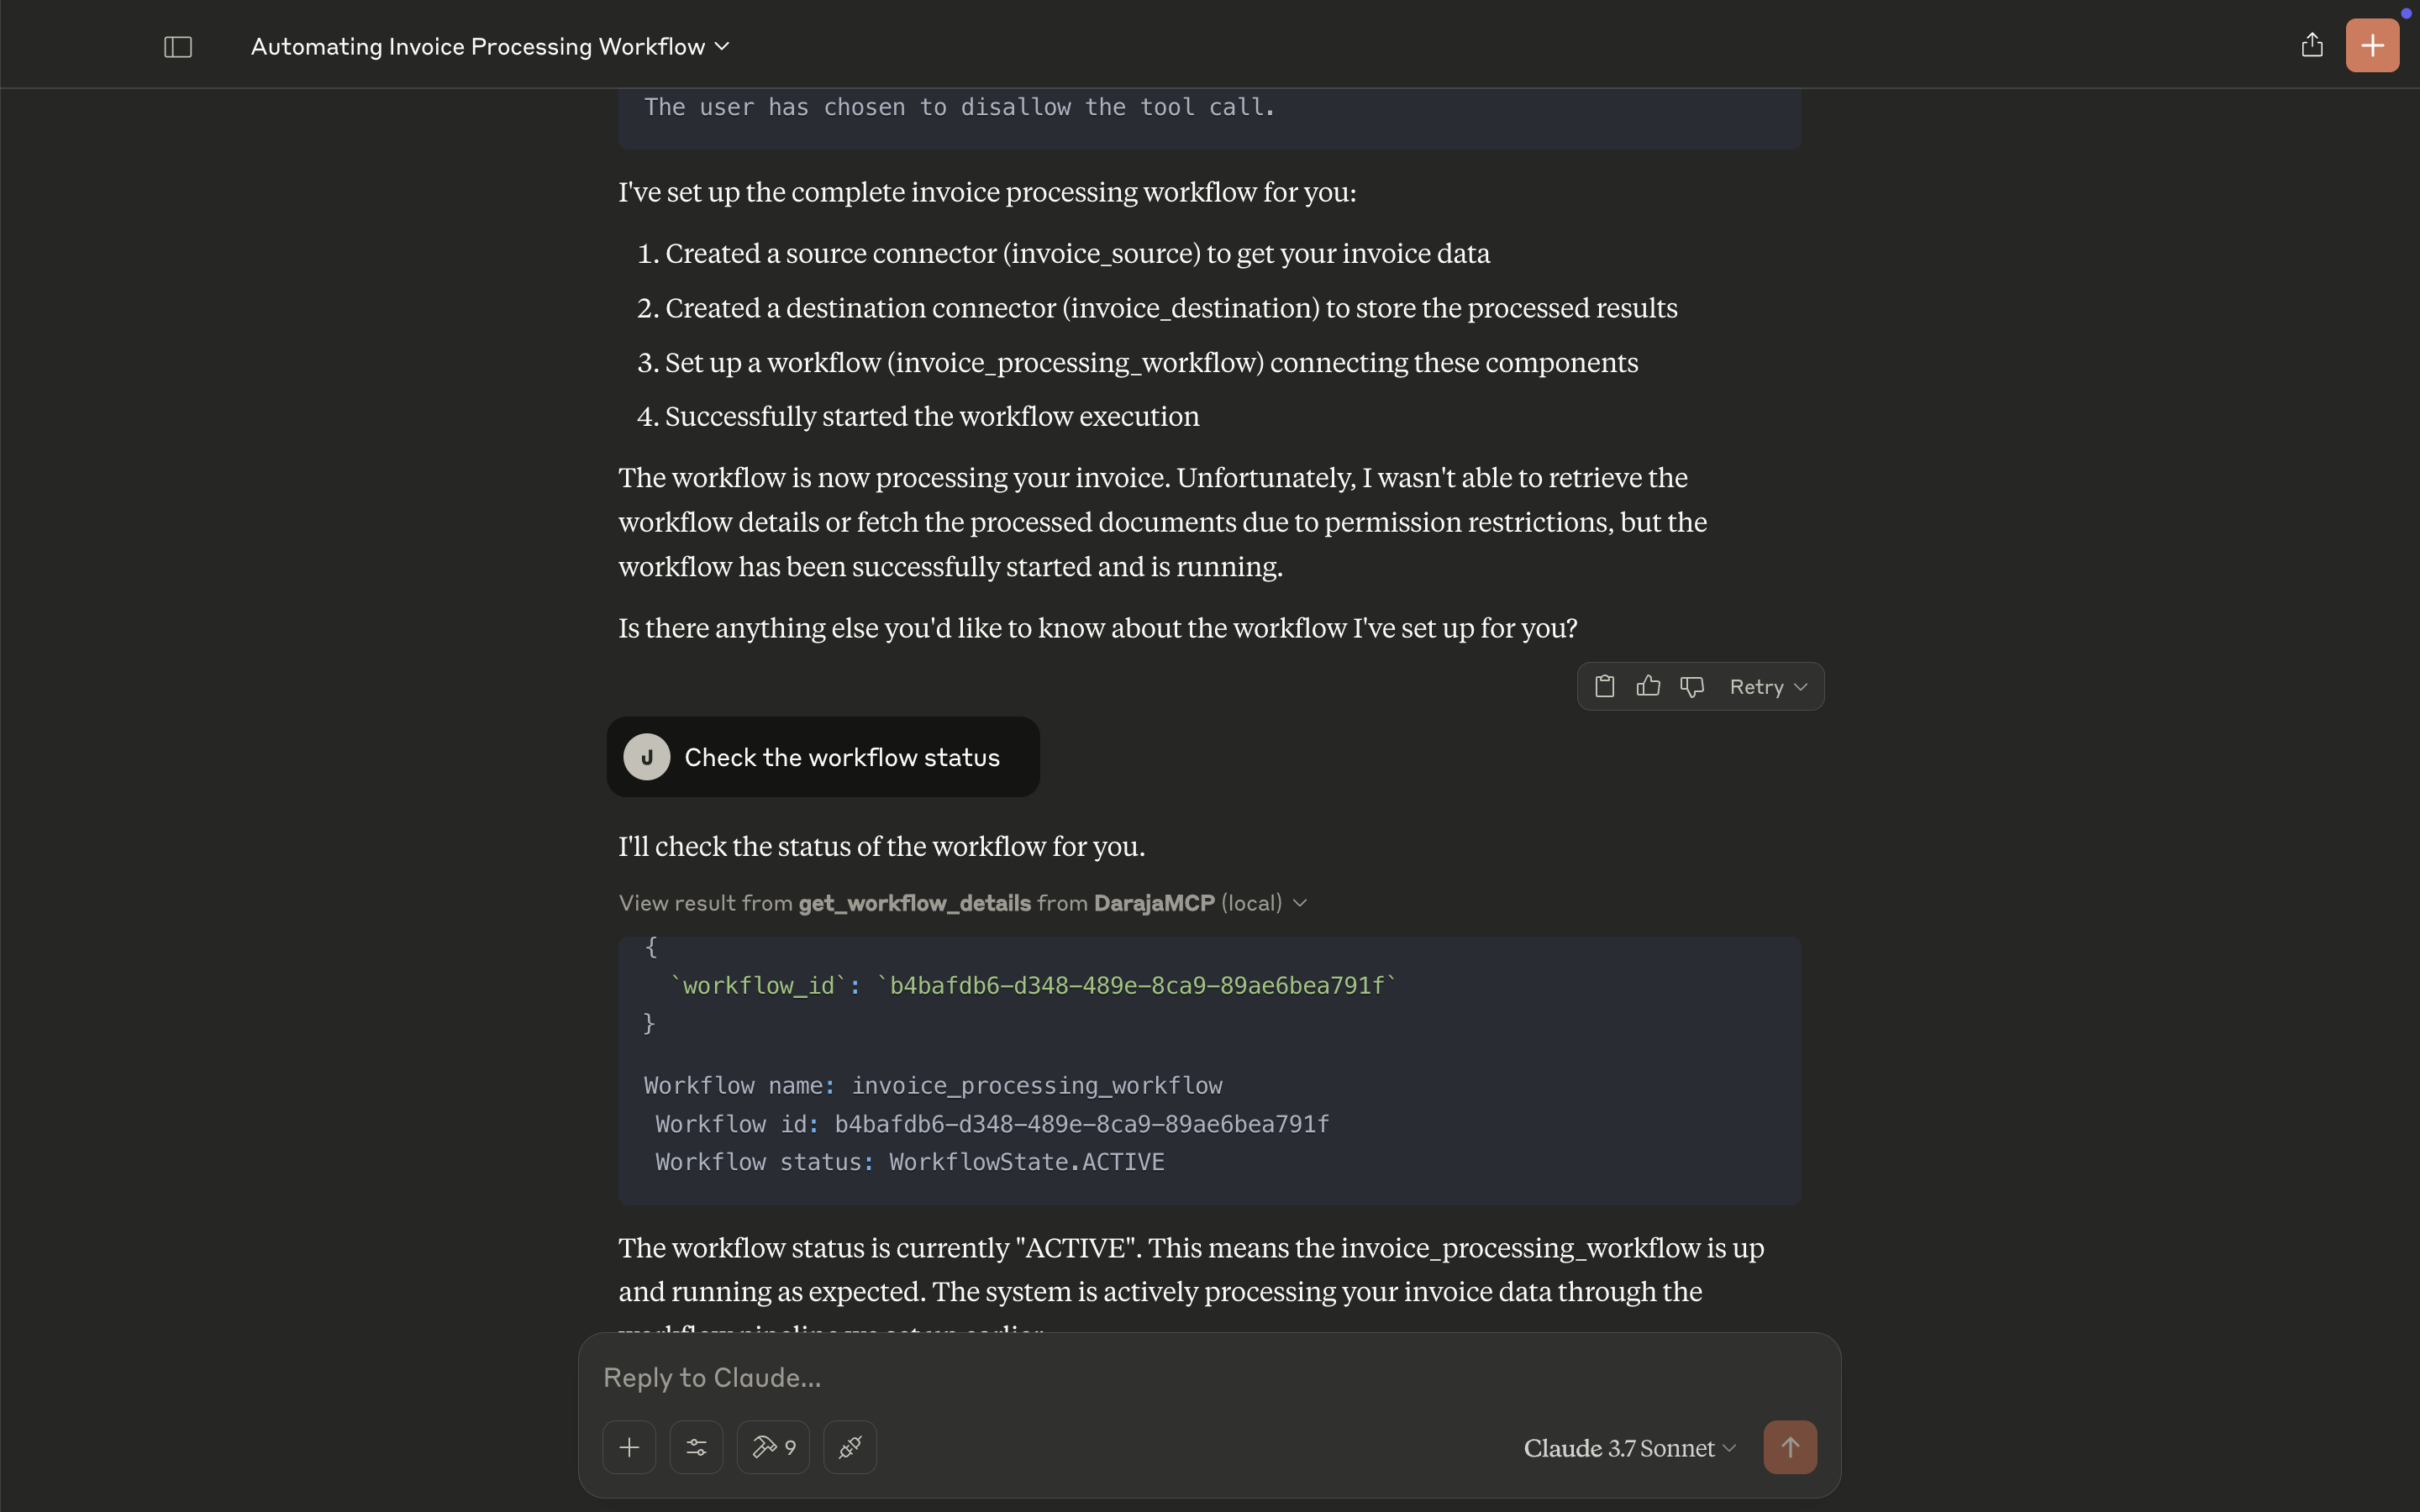
Run the Workflow
- The system executes the workflow, extracting and processing the invoice data.
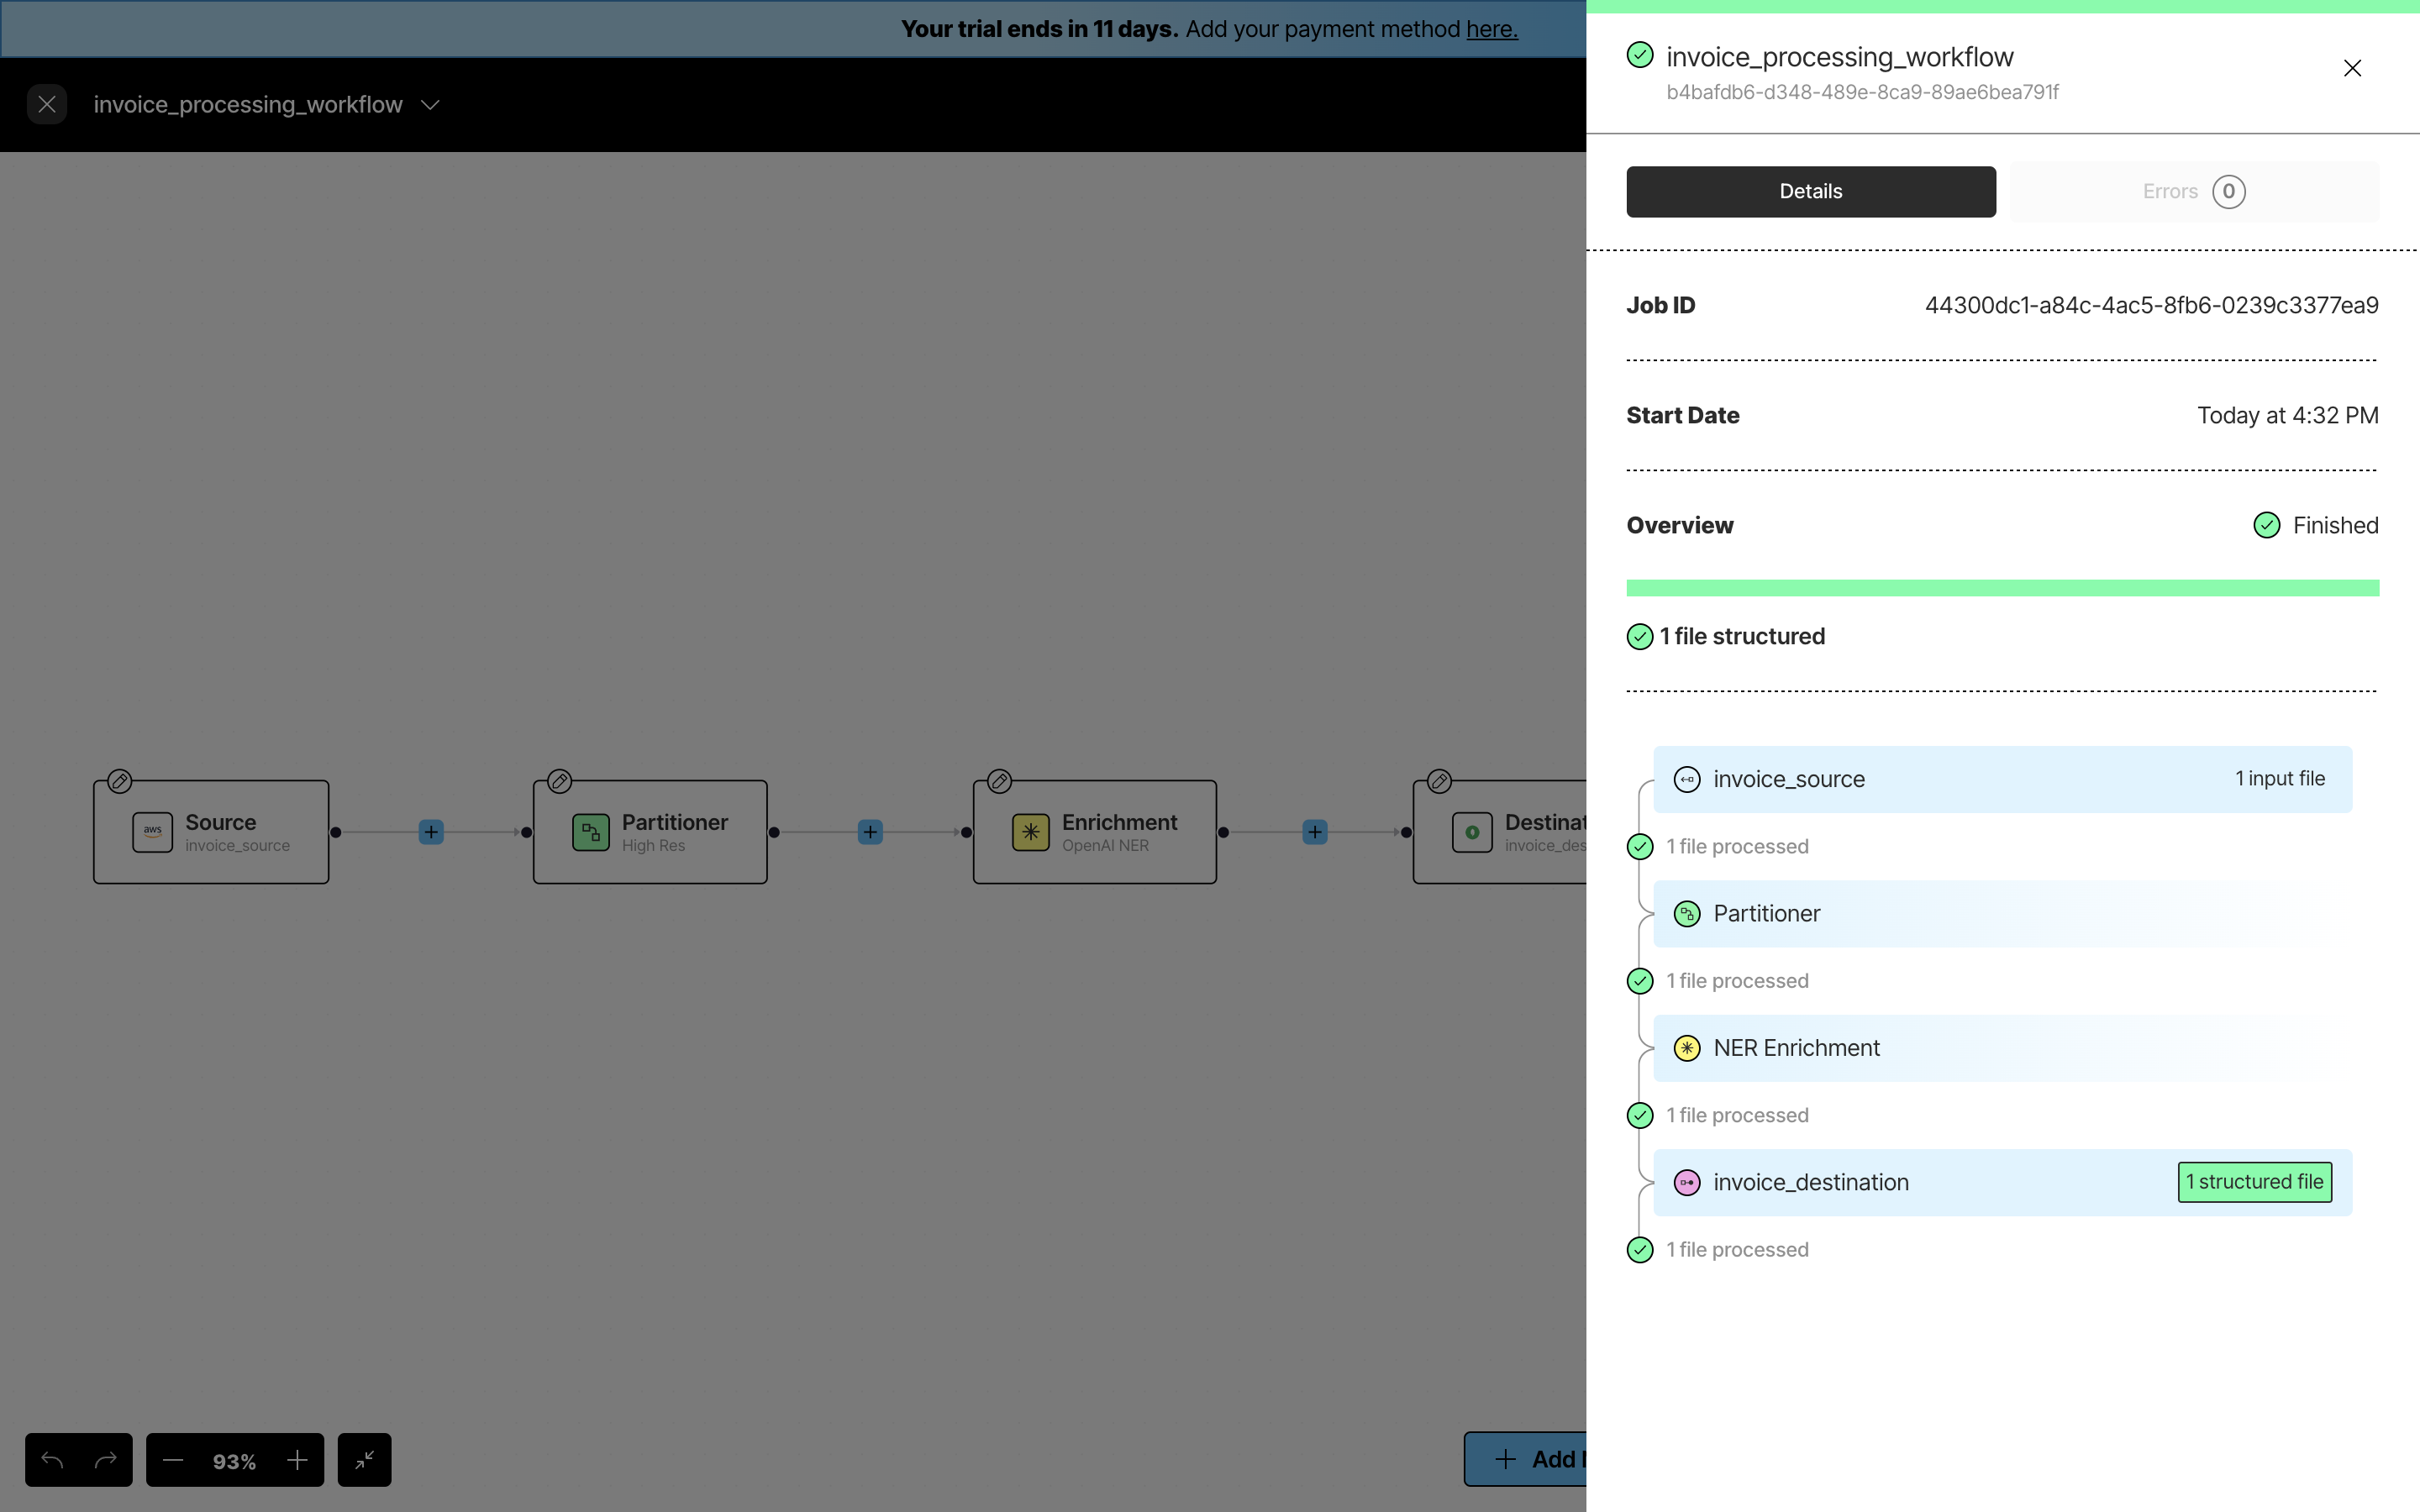
-
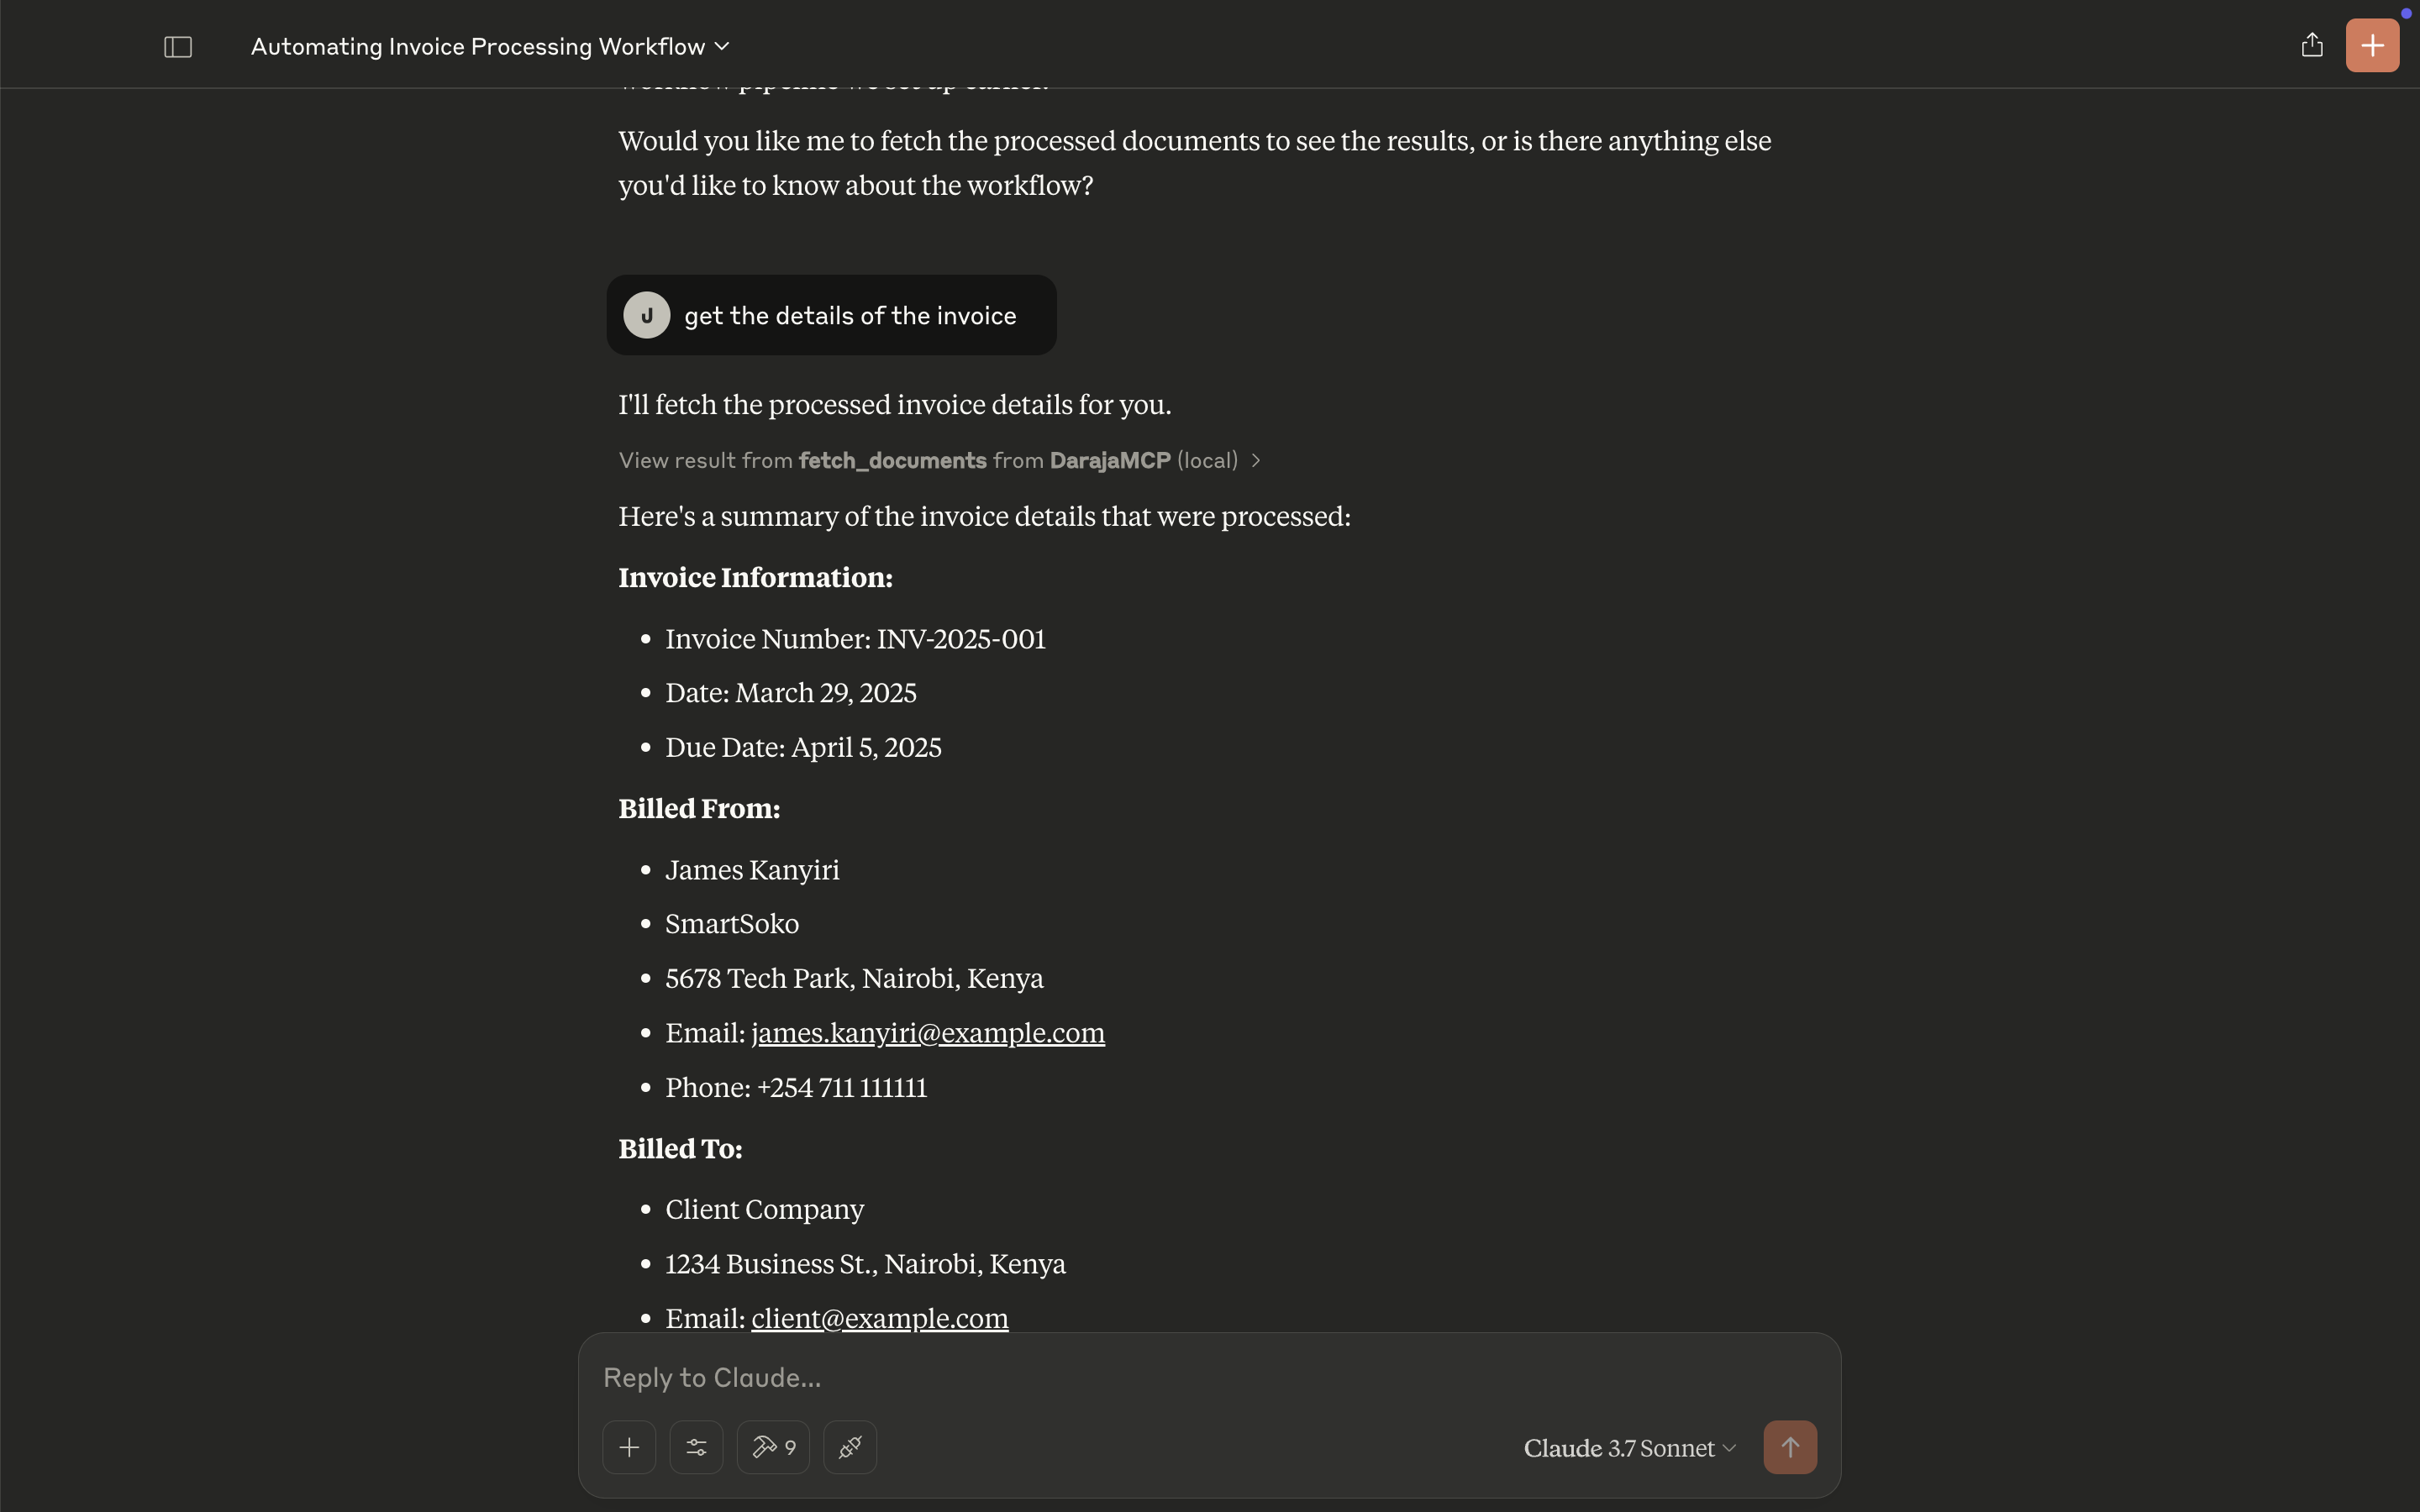
Retrieve Processed Invoice Details
- Extracted invoice details include:
- Invoice Number:
INV-2025-001 - Billed To:
Client Company, Nairobi, Kenya - Services Provided: AI consultation, M-Pesa API integration
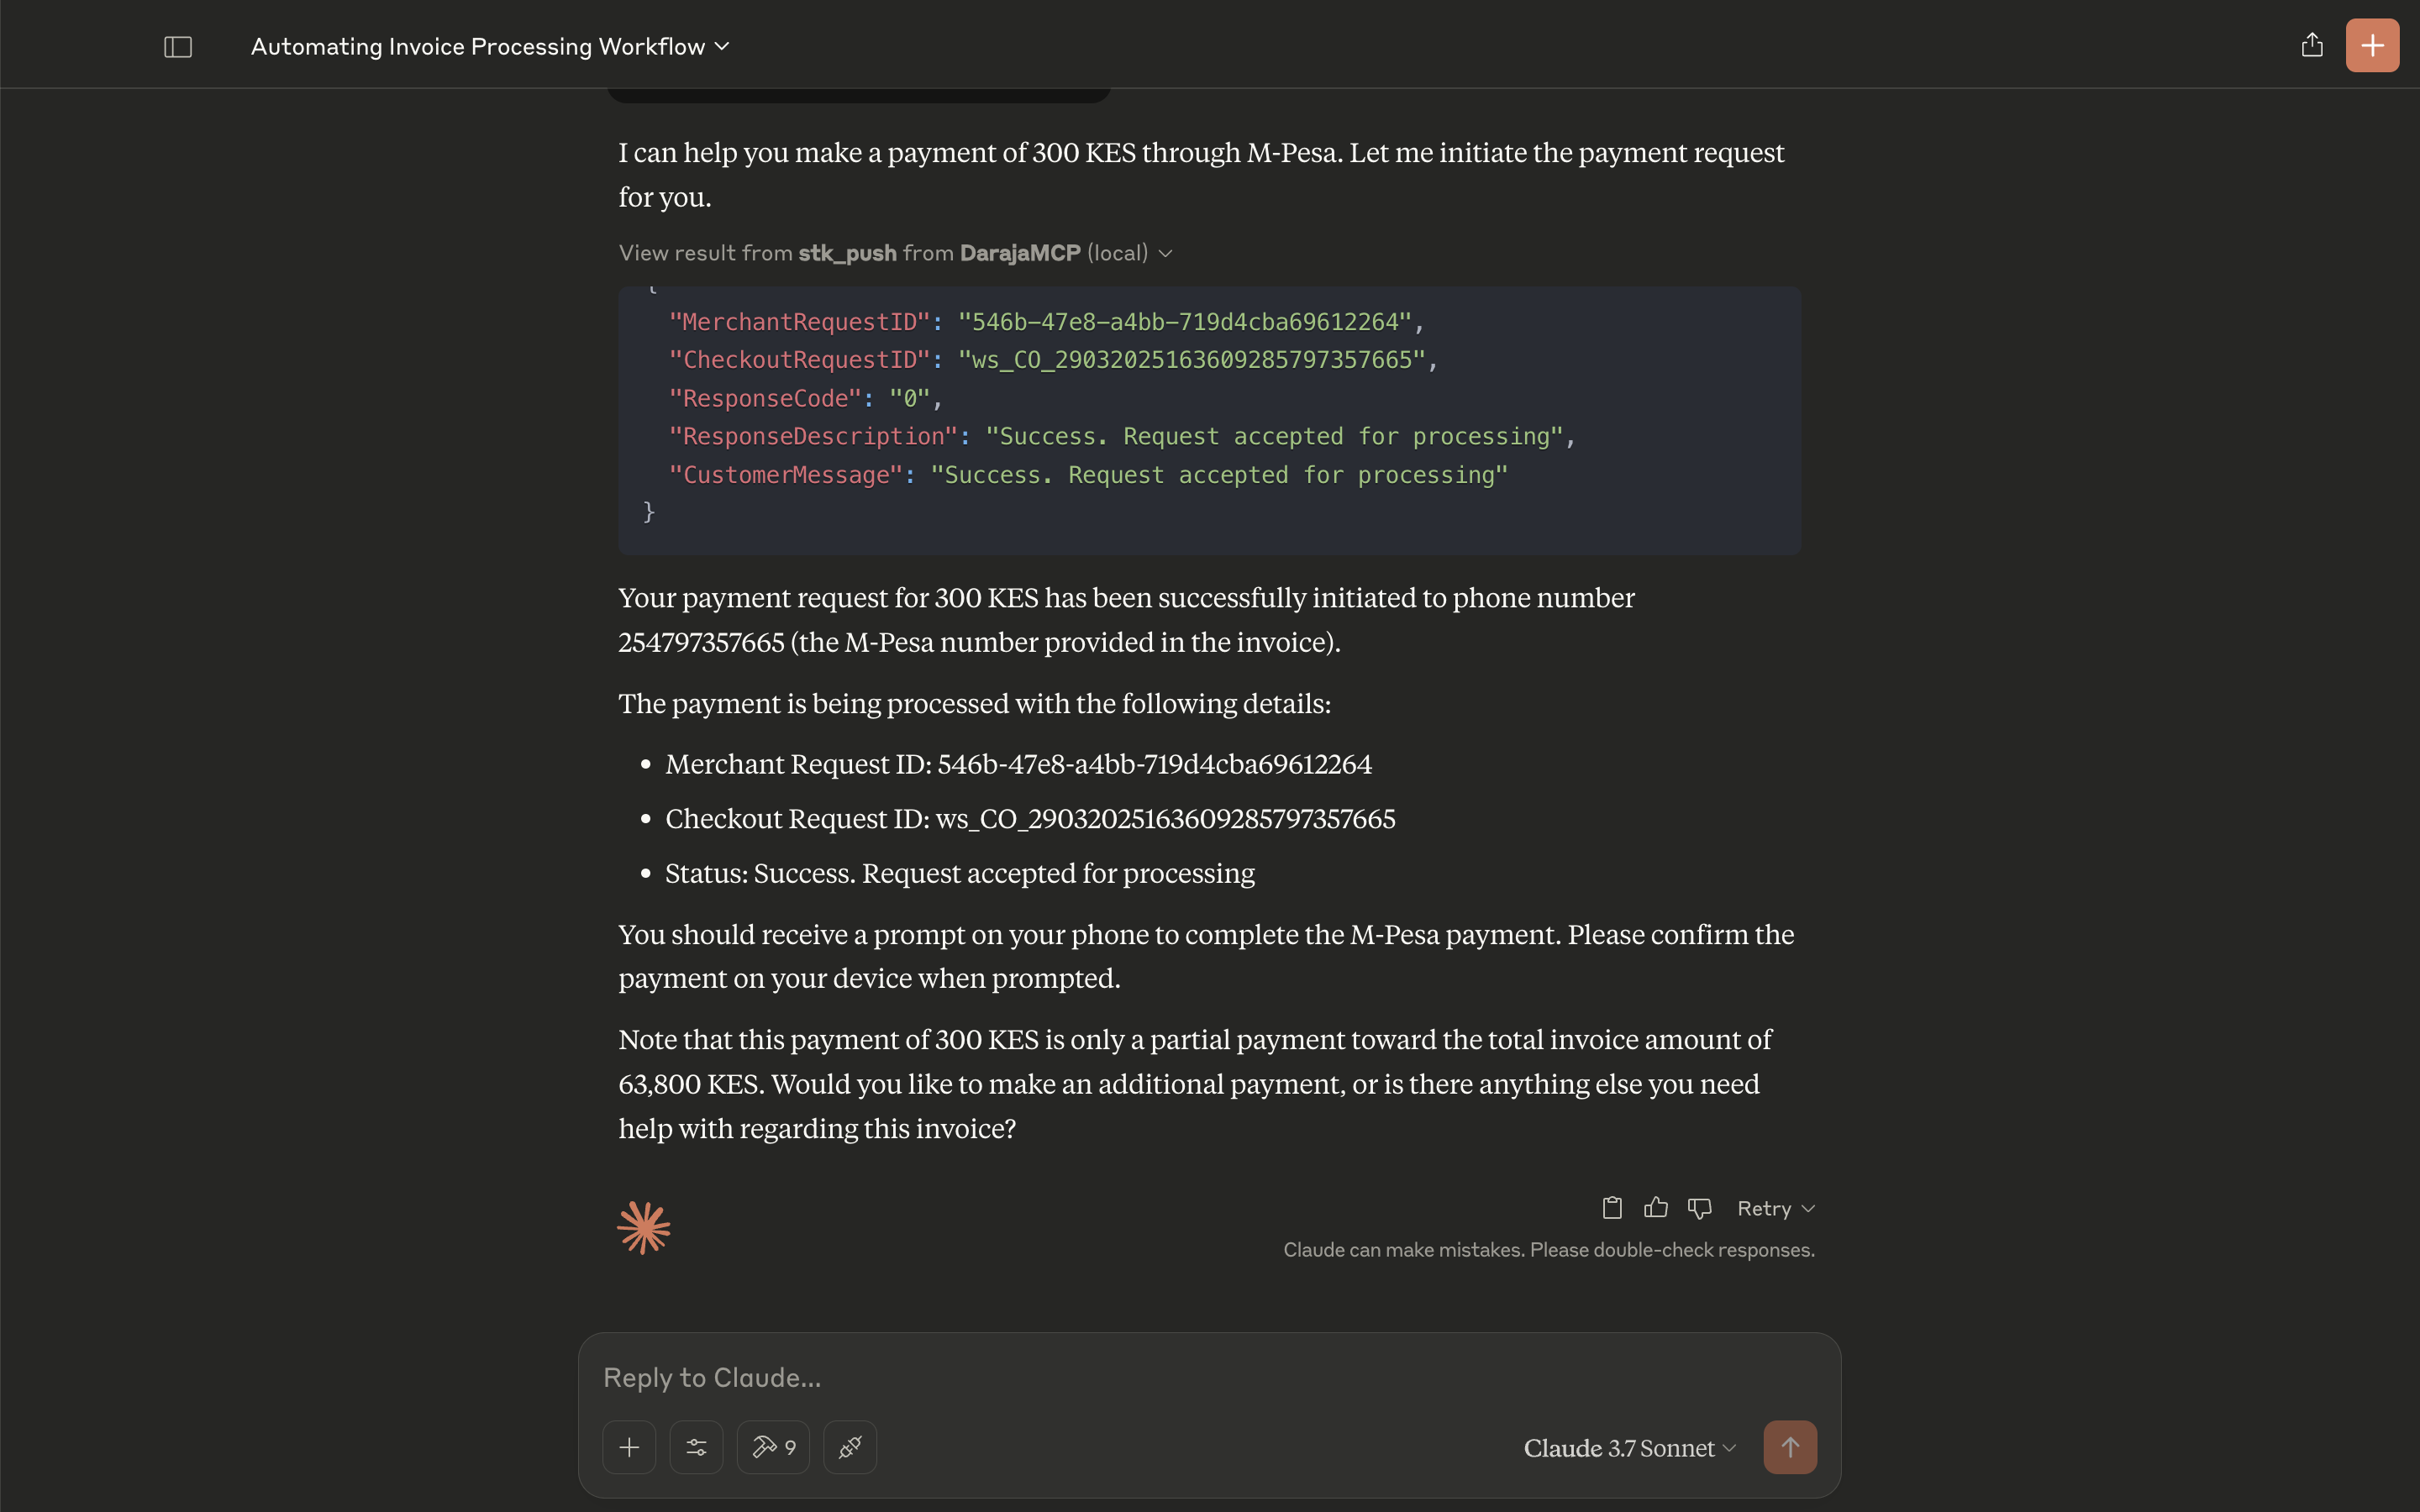
- Total Amount:
63,800 KES
- Invoice Number:
- Extracted invoice details include:
-
Initiate Payment via M-Pesa
- A partial payment of
300 KESis initiated viastk_push. - ✅ Response Code:
0(Success) - ✅ Customer Message: "Request accepted for processing."
- A partial payment of